Well, this is completely f'd up. Suddenly, outbound SMTP mail from Evolution on my Fedora 10 install just stopped working. The only thing I had done was install Alpine, the most recent version of what used to be the Pine command line email program.
Digging further, I found this post suggesting that both Compuserve and Comcast have been using port 587 instead of port 25 to receive SMTP email.
Thanks Comcast. You just killed more than two hours of my time. You incompetent fools.
Friday, February 20, 2009


Sunday, February 15, 2009
100% cpu on vmware fusion 2.0.2 with Mac OSX 10.5.6
This weekend, I installed Fusion 2.0.2 on my MacBook Pro 17" (dual core 2.4Ghz, 2GB RAM) running OSX 10.5.6. I was running an XP SP2 VM using one processor and 512MB. The one dedicated CPU would spike to 100% and my mouse disappeared. Thus, I had to control XP via the keyboard, always an exciting task. Of course, the display was really sluggish as others in this thread have reported. I did try the reinstall of VMware Tools, but that didn't work. Two things in conjunction did work:
1) under Settings -> Sharing -> Shared Applications, I disabled "Allow your Mac to open applications in the virtual machine"
2) in the same dialog box, select "Never" for "Show running virtual machine applications in the dock". This essentially disables Unity mode for that option.
Update 2009/02/16
Shutdown your vm and restart Fusion to make sure the changes are effective.
*** end update ***
Update 2009/02/18
I should clarify that my MacBook was upgraded to OSX 10.5 Leopard recently. I believe the DVD upgraded it to 10.5.4, and then I did another interim upgrade via Internet download to 10.5.6
*** end update ***
When you read the list of caveats in the VMware Fusion Release Notes, it is quite a litany of troubles. I guess this is where complexity gets us..too many combinations of guest and host OS versions for the company to adequately QA their products.
Unfortunately, it cost me at least two hours of my time today.
TAG
References:
Beginner's Guide to VMware Fusion
Power User's Guide to VMware Fusion
Resizing Virtual Disks with Step-by-Step Instructions
Run a Virtual Machine at Boot
Workstation 6 Manual
Modifying Fusion's Network Settings
1) under Settings -> Sharing -> Shared Applications, I disabled "Allow your Mac to open applications in the virtual machine"
2) in the same dialog box, select "Never" for "Show running virtual machine applications in the dock". This essentially disables Unity mode for that option.
Update 2009/02/16
Shutdown your vm and restart Fusion to make sure the changes are effective.
*** end update ***
Update 2009/02/18
I should clarify that my MacBook was upgraded to OSX 10.5 Leopard recently. I believe the DVD upgraded it to 10.5.4, and then I did another interim upgrade via Internet download to 10.5.6
*** end update ***
When you read the list of caveats in the VMware Fusion Release Notes, it is quite a litany of troubles. I guess this is where complexity gets us..too many combinations of guest and host OS versions for the company to adequately QA their products.
Unfortunately, it cost me at least two hours of my time today.
TAG
References:
Beginner's Guide to VMware Fusion
Power User's Guide to VMware Fusion
Resizing Virtual Disks with Step-by-Step Instructions
Run a Virtual Machine at Boot
Workstation 6 Manual
Modifying Fusion's Network Settings
Wednesday, February 11, 2009
the pleasure of command line email
I don't think there is anything as satisfying as the simplicity of sending an email at the command line. Like so:
[sodo@ogre ~]$ mail -s "short and sweet" cacasododom@gmail.com
This is my email.
.
EOT
[sodo@ogre ~]$
Simplicity Itself
I mean, really, how sweet is that? No opening a big fat email client, no clicking "Compose Email", no clicking into an address textbox field, no surfing through lists of adressees, you get the point. Command line email is simplicity itself. Of course, its simplicity is its drawback..you can't do the fancy stuff. But for simple communications or piping the input of text files into an email and sending it off, command line email can't be beat.
[sodo@ogre ~]$ mail -s "Fedora 10 random lockups" cacasododom@gmail.com
[sodo@ogre ~]$
Sending Mail Via Comcast
Fedora 10's base install comes with "mail". However, you need to tweak your .mailrc file for it to work with your mail provider. In my case, I am on Comcast. Comcast's mail requires your username and password. And of course you need to specify the outbound SMTP server. Finally, I want to set the "From:" address, so replies go to the right place. So my .mailrc file looks like this:
[sodo@ogre ~]$ cat .mailrc
set smtp-auth-user=myaccount
set smtp-auth-password=password
set smtp=smtp.comcast.net
set from=myaccount@comcast.net
Just put this .mailrc file in your home directory and you should be good to go. Test it by sending a mail from the command line:
[sodo@ogre ~]$ mail -s "test email #1" yourtestemail@mailhost.com < /dev/null
[sodo@ogre ~]$
Test That This Works
After sending your email, you may get a bounce back if something is incorrectly configured. So you may receive a message at the command line:
[sodo@ogre ~]$
You have new mail in /var/spool/mail/root
[sodo@ogre ~]$
Just type "mail" and hit enter. The interactive version of "mail" will start and you'll see a list of mail headers:
[sodo@ogre ~]$ mail
Heirloom Mail version 12.4 7/29/08. Type ? for help.
"/var/spool/mail/sodo": 2 messages
> 1 Mail Delivery Subsys Fri Feb 6 11:07 253/20968 "Returned mail: see transcript for details"
2 Mail Delivery Subsys Fri Feb 6 11:07 249/20491 "Returned mail: see transcript for details"
Type the number of the email header (1, 2, 3, etc) to see its contents.
Message
1:From MAILER-DAEMON@localhost.localdomain Fri Feb 6 11:07:40 2009
Return-Path: <MAILER-DAEMON@localhost.localdomain>
Date: Fri, 6 Feb 2009 11:07:40 -0500
From: Mail Delivery Subsystem <MAILER-DAEMON@localhost.localdomain>
To: <sodo@localhost.localdomain>
Content-Type: multipart/report; report-type=delivery-status; boundary="n16G7eTG018842.1233936460/localhost.localdomain"
Subject: Returned mail: see transcript for details
Auto-Submitted: auto-generated (failure)
Status: RO
Part 1:
The original message was received at Fri, 6 Feb 2009 11:07:39 -0500
from localhost.localdomain [127.0.0.1]
----- The following addresses had permanent fatal errors -----<cacasododom@gmail.com> (reason: 554 Blocked by SPAM RBL check senderbase.org orwikipedia.org/wiki/DNSBL)
Debug
Usually, there will be a very clear indication in the email as to what is going on. Such as in the above email:
reason: 554 Blocked by SPAM RBL check senderbase.org orwikipedia.org/wiki/DNSBL
Type "quit" to exit.
So that's it. Enjoy your command line email!
TAG
PS - As shown in the example above, I have been experiencing some random lockups in Fedora 10: http://forums.fedoraforum.org/showthread.php?t=205950
My current workaround is to use the "noapic" command line option. But I will need to further investigate why these lockups just started happening with Fedora 10. They didn't happen with Fedora 9 or 7!
[sodo@ogre ~]$ mail -s "short and sweet" cacasododom@gmail.com
This is my email.
.
EOT
[sodo@ogre ~]$
Simplicity Itself
I mean, really, how sweet is that? No opening a big fat email client, no clicking "Compose Email", no clicking into an address textbox field, no surfing through lists of adressees, you get the point. Command line email is simplicity itself. Of course, its simplicity is its drawback..you can't do the fancy stuff. But for simple communications or piping the input of text files into an email and sending it off, command line email can't be beat.
[sodo@ogre ~]$ mail -s "Fedora 10 random lockups" cacasododom@gmail.com
[sodo@ogre ~]$
Sending Mail Via Comcast
Fedora 10's base install comes with "mail". However, you need to tweak your .mailrc file for it to work with your mail provider. In my case, I am on Comcast. Comcast's mail requires your username and password. And of course you need to specify the outbound SMTP server. Finally, I want to set the "From:" address, so replies go to the right place. So my .mailrc file looks like this:
[sodo@ogre ~]$ cat .mailrc
set smtp-auth-user=myaccount
set smtp-auth-password=password
set smtp=smtp.comcast.net
set from=myaccount@comcast.net
Just put this .mailrc file in your home directory and you should be good to go. Test it by sending a mail from the command line:
[sodo@ogre ~]$ mail -s "test email #1" yourtestemail@mailhost.com < /dev/null
[sodo@ogre ~]$
Test That This Works
After sending your email, you may get a bounce back if something is incorrectly configured. So you may receive a message at the command line:
[sodo@ogre ~]$
You have new mail in /var/spool/mail/root
[sodo@ogre ~]$
Just type "mail" and hit enter. The interactive version of "mail" will start and you'll see a list of mail headers:
[sodo@ogre ~]$ mail
Heirloom Mail version 12.4 7/29/08. Type ? for help.
"/var/spool/mail/sodo": 2 messages
> 1 Mail Delivery Subsys Fri Feb 6 11:07 253/20968 "Returned mail: see transcript for details"
2 Mail Delivery Subsys Fri Feb 6 11:07 249/20491 "Returned mail: see transcript for details"
Type the number of the email header (1, 2, 3, etc) to see its contents.
Message
1:From MAILER-DAEMON@localhost.localdomain Fri Feb 6 11:07:40 2009
Return-Path: <MAILER-DAEMON@localhost.localdomain>
Date: Fri, 6 Feb 2009 11:07:40 -0500
From: Mail Delivery Subsystem <MAILER-DAEMON@localhost.localdomain>
To: <sodo@localhost.localdomain>
Content-Type: multipart/report; report-type=delivery-status; boundary="n16G7eTG018842.1233936460/localhost.localdomain"
Subject: Returned mail: see transcript for details
Auto-Submitted: auto-generated (failure)
Status: RO
Part 1:
The original message was received at Fri, 6 Feb 2009 11:07:39 -0500
from localhost.localdomain [127.0.0.1]
----- The following addresses had permanent fatal errors -----<cacasododom@gmail.com> (reason: 554 Blocked by SPAM RBL check senderbase.org orwikipedia.org/wiki/DNSBL)
Debug
Usually, there will be a very clear indication in the email as to what is going on. Such as in the above email:
reason: 554 Blocked by SPAM RBL check senderbase.org orwikipedia.org/wiki/DNSBL
Type "quit" to exit.
So that's it. Enjoy your command line email!
TAG
PS - As shown in the example above, I have been experiencing some random lockups in Fedora 10: http://forums.fedoraforum.org/showthread.php?t=205950
My current workaround is to use the "noapic" command line option. But I will need to further investigate why these lockups just started happening with Fedora 10. They didn't happen with Fedora 9 or 7!
Tuesday, February 10, 2009
creating a ramdisk in Linux
So I have all this extra memory going unused and want to make a really fast drive for video editing. That's how it starts.
*** Update 2013/04/20 ***
Easiest method here to create a temporary file system in RAM: http://forums.fedoraforum.org/showthread.php?t=272413
On my new i7 box, I was able to create the ramdisk, mount it and test it successfully by using dd:
Create a mount point
[sodo@monstrous ~]$ mkdir -p /mnt/ramdisk
Create The Ramdisk
[sodo@monstrous ~]$ mount -t tmpfs -o size=19.1G tmpfs /mnt/ramdisk
Test it Out
[sodo@monstrous ~]$ dd if=/dev/zero of=/mnt/ramdisk/zerofile.tst bs=1k count=19100000
19100000+0 records in
19100000+0 records out
19558400000 bytes (20 GB) copied, 15.1903 s, 1.3 GB/s
It created the 19GB file in about 25 seconds. Amazing.
*** end update ***
In the example below, I'll show you the short steps to create a 6GB ramdisk. I'm running Fedora 10, x86-64.
1) pass an argument to the kernel
This usually involves editing /etc/grub.conf, finding the line beginning with "kernel" and adding the below parameter to it:
ramdisk_size="some size in kilobytes"
For example:
ramdisk_size=6291456
2) reboot
3) take a look at your ramdisk on the filesystem
[sodo@ogre ~]$ dmesg | grep RAMDISK
RAMDISK: 37c75000 - 37fef3a0
#3 [0037c75000 - 0037fef3a0] RAMDISK ==> [0037c75000 - 0037fef3a0]
[sodo@ogre ~]$ ls -lh /dev/ramdisk*
lrwxrwxrwx 1 root root 4 2009-02-09 23:15 /dev/ramdisk -> ram0
brw-rw---- 1 root disk 1, 0 2009-02-09 23:15 /dev/ram0
Looks like the ramdisk is pointing to /dev/ram0!
4) format the ramdisk device as a filesystem
[sodo@ogre ~]$ mke2fs -m 0 /dev/ram0
mke2fs 1.41.3 (12-Oct-2008)
Filesystem label=
OS type: Linux
Block size=4096 (log=2)
Fragment size=4096 (log=2)
393216 inodes, 1572864 blocks
0 blocks (0.00%) reserved for the super user
First data block=0
Maximum filesystem blocks=1610612736
48 block groups
32768 blocks per group, 32768 fragments per group
8192 inodes per group
Superblock backups stored on blocks:
32768, 98304, 163840, 229376, 294912, 819200, 884736
Writing inode tables: done
Writing superblocks and filesystem accounting information: done
This filesystem will be automatically checked every 37 mounts or
180 days, whichever comes first. Use tune2fs -c or -i to override.
4) create a mount point
[sodo@ogre ~]$ mkdir /mnt/ramdisk
5) mount the ramdisk as a usable filesystem
[sodo@ogre ~]$ mount /dev/ram0 /mnt/ramdisk
6) check out how much space you have on the filesystem
[sodo@ogre ~]$ df -m
Filesystem 1M-blocks Used Available Use% Mounted on
/dev/md0 459121 10491 425309 3% /
/dev/md2 469453 413351 32255 93% /mnt
/dev/sda1 190 22 159 12% /boot
tmpfs 5013 0 5013 0% /dev/shm
/dev/ram0 6048 12 6036 1% /mnt/ramdisk
7) copy some files to it
[sodo@ogre ~]$ ll /mnt/ramdisk/
total 4018740
drwx------ 2 root root 16384 2009-02-09 23:20 lost+found
-rw-rw-r-- 1 sodo sodo 50590800 2009-02-09 23:24 mvi_0703.m2t
-rw-rw-r-- 1 sodo sodo 318906280 2009-02-09 23:24 mvi_0705.m2t
-rw-rw-r-- 1 sodo sodo 599845208 2009-02-09 23:24 mvi_0706.m2t
Pretty cool.
After it seems to be working, I decided to add the few steps necessary to /etc/rc.local, so that my ramdrive can come up on boot:
mke2fs -m 0 /dev/ram0
mount /dev/ram0 /mnt/ramdisk
chown youruser:youruser /mnt/ramdisk
TAG
Reference
http://jayant7k.blogspot.com/2006/08/ram-disk-in-linux.html
*** Update 2013/04/20 ***
Easiest method here to create a temporary file system in RAM: http://forums.fedoraforum.org/showthread.php?t=272413
On my new i7 box, I was able to create the ramdisk, mount it and test it successfully by using dd:
Create a mount point
[sodo@monstrous ~]$ mkdir -p /mnt/ramdisk
Create The Ramdisk
[sodo@monstrous ~]$ mount -t tmpfs -o size=19.1G tmpfs /mnt/ramdisk
Test it Out
[sodo@monstrous ~]$ dd if=/dev/zero of=/mnt/ramdisk/zerofile.tst bs=1k count=19100000
19100000+0 records in
19100000+0 records out
19558400000 bytes (20 GB) copied, 15.1903 s, 1.3 GB/s
It created the 19GB file in about 25 seconds. Amazing.
*** end update ***
In the example below, I'll show you the short steps to create a 6GB ramdisk. I'm running Fedora 10, x86-64.
1) pass an argument to the kernel
This usually involves editing /etc/grub.conf, finding the line beginning with "kernel" and adding the below parameter to it:
ramdisk_size="some size in kilobytes"
For example:
ramdisk_size=6291456
2) reboot
3) take a look at your ramdisk on the filesystem
[sodo@ogre ~]$ dmesg | grep RAMDISK
RAMDISK: 37c75000 - 37fef3a0
#3 [0037c75000 - 0037fef3a0] RAMDISK ==> [0037c75000 - 0037fef3a0]
[sodo@ogre ~]$ ls -lh /dev/ramdisk*
lrwxrwxrwx 1 root root 4 2009-02-09 23:15 /dev/ramdisk -> ram0
brw-rw---- 1 root disk 1, 0 2009-02-09 23:15 /dev/ram0
Looks like the ramdisk is pointing to /dev/ram0!
4) format the ramdisk device as a filesystem
[sodo@ogre ~]$ mke2fs -m 0 /dev/ram0
mke2fs 1.41.3 (12-Oct-2008)
Filesystem label=
OS type: Linux
Block size=4096 (log=2)
Fragment size=4096 (log=2)
393216 inodes, 1572864 blocks
0 blocks (0.00%) reserved for the super user
First data block=0
Maximum filesystem blocks=1610612736
48 block groups
32768 blocks per group, 32768 fragments per group
8192 inodes per group
Superblock backups stored on blocks:
32768, 98304, 163840, 229376, 294912, 819200, 884736
Writing inode tables: done
Writing superblocks and filesystem accounting information: done
This filesystem will be automatically checked every 37 mounts or
180 days, whichever comes first. Use tune2fs -c or -i to override.
4) create a mount point
[sodo@ogre ~]$ mkdir /mnt/ramdisk
5) mount the ramdisk as a usable filesystem
[sodo@ogre ~]$ mount /dev/ram0 /mnt/ramdisk
6) check out how much space you have on the filesystem
[sodo@ogre ~]$ df -m
Filesystem 1M-blocks Used Available Use% Mounted on
/dev/md0 459121 10491 425309 3% /
/dev/md2 469453 413351 32255 93% /mnt
/dev/sda1 190 22 159 12% /boot
tmpfs 5013 0 5013 0% /dev/shm
/dev/ram0 6048 12 6036 1% /mnt/ramdisk
7) copy some files to it
[sodo@ogre ~]$ ll /mnt/ramdisk/
total 4018740
drwx------ 2 root root 16384 2009-02-09 23:20 lost+found
-rw-rw-r-- 1 sodo sodo 50590800 2009-02-09 23:24 mvi_0703.m2t
-rw-rw-r-- 1 sodo sodo 318906280 2009-02-09 23:24 mvi_0705.m2t
-rw-rw-r-- 1 sodo sodo 599845208 2009-02-09 23:24 mvi_0706.m2t
Pretty cool.
After it seems to be working, I decided to add the few steps necessary to /etc/rc.local, so that my ramdrive can come up on boot:
mke2fs -m 0 /dev/ram0
mount /dev/ram0 /mnt/ramdisk
chown youruser:youruser /mnt/ramdisk
TAG
Reference
http://jayant7k.blogspot.com/2006/08/ram-disk-in-linux.html
Tuesday, February 03, 2009
handy TOP reference
Top is a program that monitors the CPU and memory utilization of individual processes on your Unix or Linux machine. The output of top normally defaults to a list of processes sorted from high CPU to low CPU utilization. It is helpful to know some of the commands, so that you can sort through and find specific processes based on memory, status or any number of statistics top has available to it.
The command sets listed below were tested in Fedora 10, but vary across distributions. Use the ? or type "h" to get the list of commands specific to your distribution.
default output
To run top interactively, just type "top" at a command line and hit enter. It will refresh once every three seconds by default until you quit (press "Q") to exit.
top - 14:23:03 up 14 days, 4:16, 4 users, load average: 0.25, 0.13, 0.09
Tasks: 127 total, 1 running, 125 sleeping, 0 stopped, 1 zombie
Cpu(s): 15.8%us, 9.0%sy, 0.0%ni, 74.5%id, 0.0%wa, 0.6%hi, 0.1%si, 0.0%st
Mem: 551296k total, 498888k used, 52408k free, 43980k buffers
Swap: 2031608k total, 88k used, 2031520k free, 134708k cached
PID USER PR NI VIRT RES SHR S %CPU %MEM TIME+ COMMAND
2406 tag 15 0 74868 45m 8860 S 43 8.4 3:58.37 Xorg
2541 tag 15 0 68596 17m 8636 S 6 3.3 0:18.07 gnome-terminal
18561 tag 15 0 734m 143m 12m S 1 26.6 0:09.36 cinelerra
2527 tag 15 0 17804 8992 6532 S 0 1.6 0:13.27 metacity
2405 tag 15 0 16636 1652 1080 S 0 0.3 0:06.01 gdm-binary
2657 tag 15 0 48260 10m 7788 S 0 1.9 0:22.62 mixer_applet2
19284 tag 15 0 2164 1036 796 R 0 0.2 0:00.06 top
You see the output defaults to a list of processes the length of your terminal window. To shorten this list to a more manageable set of processes, type # or n to limit the number of tasks displayed.
To sort the list by a column other than %CPU, type <> to sort the output by the column that is to the left or right of %CPU.
To choose a specific column to sort by, press "F" or "O" and select the letter that corresponds to the column you'd like to sort.
To reverse the sort, press "R"
To toggle columns of data on and off, press "f".
Interactive Mode
Here is a list of commands that you can type while in interactive mode:
f - toggle individual fields on and off
F or O - choose a field to sort on
?/h - help
H - toggle the display of program threads
I - toggle IRIX mode
K - kill a process
M - sort on %MEM
N - sort on process ID (PID)
P - sort on %CPU
R - reverse the sort
T - sort on TIME process has been running
U - select processes by user
#/n - display n number of processes
enter - refresh display
Process States
A process can be in a number of states, shown by the Status column:
D - uninterruptable sleep
R - running
S - sleeping
T - traced or stopped
Z - zombie
Command line options
-d delay in seconds
-p display process ID (PID)
-H toggle display of threads
-i toggle idle processes
-n number of iterations before top ends
-u monitor by user
-v version
Notes on fields related to memory
VIRT = total amount of virtual memory used by the task. Includes all code/data/shared libraries and swapped pages
VIRT = SWAP + RES
SWAP = the swapped out portion of a task's total virtual memory
RES = Non-swapped physical memory a task has used
RES = CODE + DATA
CODE = amount of physical memory devoted to executable code. "text resident set"
DATA = amount of physical memory devoted to other than executable code. "data resident set"
SHR = amount of shared memory. This reflects the memory that could be potentially shared with other processes.
On my Fedora 10 machine, I noticed that RES does NOT equal the sum of the text plus data resident sets. Maybe I should file a bug?
In any case, that's a synopsis of top.
Enjoy,
TAG
The command sets listed below were tested in Fedora 10, but vary across distributions. Use the ? or type "h" to get the list of commands specific to your distribution.
default output
To run top interactively, just type "top" at a command line and hit enter. It will refresh once every three seconds by default until you quit (press "Q") to exit.
top - 14:23:03 up 14 days, 4:16, 4 users, load average: 0.25, 0.13, 0.09
Tasks: 127 total, 1 running, 125 sleeping, 0 stopped, 1 zombie
Cpu(s): 15.8%us, 9.0%sy, 0.0%ni, 74.5%id, 0.0%wa, 0.6%hi, 0.1%si, 0.0%st
Mem: 551296k total, 498888k used, 52408k free, 43980k buffers
Swap: 2031608k total, 88k used, 2031520k free, 134708k cached
PID USER PR NI VIRT RES SHR S %CPU %MEM TIME+ COMMAND
2406 tag 15 0 74868 45m 8860 S 43 8.4 3:58.37 Xorg
2541 tag 15 0 68596 17m 8636 S 6 3.3 0:18.07 gnome-terminal
18561 tag 15 0 734m 143m 12m S 1 26.6 0:09.36 cinelerra
2527 tag 15 0 17804 8992 6532 S 0 1.6 0:13.27 metacity
2405 tag 15 0 16636 1652 1080 S 0 0.3 0:06.01 gdm-binary
2657 tag 15 0 48260 10m 7788 S 0 1.9 0:22.62 mixer_applet2
19284 tag 15 0 2164 1036 796 R 0 0.2 0:00.06 top
You see the output defaults to a list of processes the length of your terminal window. To shorten this list to a more manageable set of processes, type # or n to limit the number of tasks displayed.
To sort the list by a column other than %CPU, type <> to sort the output by the column that is to the left or right of %CPU.
To choose a specific column to sort by, press "F" or "O" and select the letter that corresponds to the column you'd like to sort.
To reverse the sort, press "R"
To toggle columns of data on and off, press "f".
Interactive Mode
Here is a list of commands that you can type while in interactive mode:
f - toggle individual fields on and off
F or O - choose a field to sort on
?/h - help
H - toggle the display of program threads
I - toggle IRIX mode
K - kill a process
M - sort on %MEM
N - sort on process ID (PID)
P - sort on %CPU
R - reverse the sort
T - sort on TIME process has been running
U - select processes by user
#/n - display n number of processes
enter - refresh display
Process States
A process can be in a number of states, shown by the Status column:
D - uninterruptable sleep
R - running
S - sleeping
T - traced or stopped
Z - zombie
Command line options
-d delay in seconds
-p display process ID (PID)
-H toggle display of threads
-i toggle idle processes
-n number of iterations before top ends
-u monitor by user
-v version
Notes on fields related to memory
VIRT = total amount of virtual memory used by the task. Includes all code/data/shared libraries and swapped pages
VIRT = SWAP + RES
SWAP = the swapped out portion of a task's total virtual memory
RES = Non-swapped physical memory a task has used
RES = CODE + DATA
CODE = amount of physical memory devoted to executable code. "text resident set"
DATA = amount of physical memory devoted to other than executable code. "data resident set"
SHR = amount of shared memory. This reflects the memory that could be potentially shared with other processes.
On my Fedora 10 machine, I noticed that RES does NOT equal the sum of the text plus data resident sets. Maybe I should file a bug?
In any case, that's a synopsis of top.
Enjoy,
TAG
Tuesday, January 27, 2009
SELinux is preventing npviewer.bin .. unconfined_t
I have to say that SELinux on Fedora 10 and media playback via Firefox is just a pain in the ass. At a minimum, SELinux will deny you from listening to audio from YouTube or Vimeo, and at most, will completely lock you out from viewing videos from those sites that use the Flash plugin.
In the setroubleshoot message browser, you'll see messages like this:
SELinux is preventing npviewer.bin (nsplugin_t) "destroy" unconfined_t.
SELinux is preventing npviewer.bin (nsplugin_t) "getattr" unconfined_t.
SELinux is preventing npviewer.bin (nsplugin_t) "read write" unconfined_t.
SELinux is preventing npviewer.bin (nsplugin_t) "unix_read unix_write" unconfined_t.
You can always solve this by disabling SELinux entirely. Of course, that's the easy way out, so I figured I'd be a good system administrator and investigate how to allow the Flash plugin to execute while keeping SELinux running. I consulted the Documentation of the Fedora project to find out what the hell to do in order to allow Flash to work in Firefox:
http://docs.fedoraproject.org/selinux-faq-fc5/#id2961385
What To Do
If you have this problem, you need to resolve it by allowing npviewer.bin to do its thing. Thus, you need to relax the SELinux policies for npviewer.bin. This boils down to a few steps:
1) pull out the most recent policy violations in /var/log/messages or /var/log/audit/audit.log
2) create a policy exclusion to allow npviewer.bin to run unimpeded by SELinux
3) compile the policy as a module
4) create a policy package
5) load the policy into the kernel
Detail
1 & 2) audit2allow both pulls out the policy violation information from your log file and formats into a Type Enforcement (.te) file. The Type Enforcement file is the basis for policy exclusions.
As my audit log had the SELinux denials listed in it, I ran this command:
[sodo@ogre ~]$ sudo audit2allow -m local -l -i /var/log/audit/audit.log > local.te
The result of that command was the Type Enforcement file. The .te file looks like this:
module local 1.0;
require {
type unconfined_t;
type nsplugin_t;
class sem destroy;
class shm { write unix_read getattr unix_write associate read };
}
#============= nsplugin_t ==============
allow nsplugin_t unconfined_t:sem destroy;
allow nsplugin_t unconfined_t:shm { write unix_read getattr unix_write associate read };
You can see the last few lines look suspiciously like the entries in the setroubleshoot browser, especially the verbs: write, unix_read, getattr, unix_write, associate, read, etc.
3) Compile the policy
The following command compiles the .te file:
[sodo@ogre ~]$ checkmodule -M -m -o local.mod local.te
checkmodule: loading policy configuration from local.te
checkmodule: policy configuration loaded
checkmodule: writing binary representation (version 8) to local.mod
4) Create a policy package
[sodo@ogre ~]$ semodule_package -o local.pp -m local.mod
5) Load the policy into the kernel
[sodo@ogre ~]$ semodule -i local.pp
If you try to load the policy as a non-priveleged (not root) user, you get this error:
[sodo@ogre ~]$ semodule: SELinux policy is not managed or store cannot be accessed.
These steps should insure that your flash plugin shall run unimpeded on your wonderful new Fedora 10 system!
Hooray!
TAG
Reference
Fedora Core 5 SELinux FAQ
SELinux: allowing AVS denials
In the setroubleshoot message browser, you'll see messages like this:
SELinux is preventing npviewer.bin (nsplugin_t) "destroy" unconfined_t.
SELinux is preventing npviewer.bin (nsplugin_t) "getattr" unconfined_t.
SELinux is preventing npviewer.bin (nsplugin_t) "read write" unconfined_t.
SELinux is preventing npviewer.bin (nsplugin_t) "unix_read unix_write" unconfined_t.
You can always solve this by disabling SELinux entirely. Of course, that's the easy way out, so I figured I'd be a good system administrator and investigate how to allow the Flash plugin to execute while keeping SELinux running. I consulted the Documentation of the Fedora project to find out what the hell to do in order to allow Flash to work in Firefox:
http://docs.fedoraproject.org/selinux-faq-fc5/#id2961385
What To Do
If you have this problem, you need to resolve it by allowing npviewer.bin to do its thing. Thus, you need to relax the SELinux policies for npviewer.bin. This boils down to a few steps:
1) pull out the most recent policy violations in /var/log/messages or /var/log/audit/audit.log
2) create a policy exclusion to allow npviewer.bin to run unimpeded by SELinux
3) compile the policy as a module
4) create a policy package
5) load the policy into the kernel
Detail
1 & 2) audit2allow both pulls out the policy violation information from your log file and formats into a Type Enforcement (.te) file. The Type Enforcement file is the basis for policy exclusions.
As my audit log had the SELinux denials listed in it, I ran this command:
[sodo@ogre ~]$ sudo audit2allow -m local -l -i /var/log/audit/audit.log > local.te
The result of that command was the Type Enforcement file. The .te file looks like this:
module local 1.0;
require {
type unconfined_t;
type nsplugin_t;
class sem destroy;
class shm { write unix_read getattr unix_write associate read };
}
#============= nsplugin_t ==============
allow nsplugin_t unconfined_t:sem destroy;
allow nsplugin_t unconfined_t:shm { write unix_read getattr unix_write associate read };
You can see the last few lines look suspiciously like the entries in the setroubleshoot browser, especially the verbs: write, unix_read, getattr, unix_write, associate, read, etc.
3) Compile the policy
The following command compiles the .te file:
[sodo@ogre ~]$ checkmodule -M -m -o local.mod local.te
checkmodule: loading policy configuration from local.te
checkmodule: policy configuration loaded
checkmodule: writing binary representation (version 8) to local.mod
4) Create a policy package
[sodo@ogre ~]$ semodule_package -o local.pp -m local.mod
5) Load the policy into the kernel
[sodo@ogre ~]$ semodule -i local.pp
If you try to load the policy as a non-priveleged (not root) user, you get this error:
[sodo@ogre ~]$ semodule: SELinux policy is not managed or store cannot be accessed.
These steps should insure that your flash plugin shall run unimpeded on your wonderful new Fedora 10 system!
Hooray!
TAG
Reference
Fedora Core 5 SELinux FAQ
SELinux: allowing AVS denials
Tuesday, January 20, 2009
sound via RDP
I was working today but wanted to listen to Obama's inauguration speech. I noticed my client's (RDP) session was configured to play sound:
Under Local Resources, Remote Computer Sound was set to "Bring to this computer."
But sound via the terminal services connection was not working. Reading up on this very nice Win2K3 tutorial site:
http://www.visualwin.com/Audio-Mapping/
I saw that I was missing the server side configuration. What you want to do is open up the Terminal Services Configuration applet (either under Control Panel -> Administration -> Terminal Services Configuration or Start -> Run -> tscc.msc) and select Properties on the RDP-Tcp connection.

Therein, select the Client Settings tab and under the "Disable the following" section, uncheck Audio Mapping. In order for the new setting to take effect, once you uncheck this setting, you'll have to logoff and log back onto your remote server.

Et Voila! You'll have sound through your RDP session!
Go Obama!

Under Local Resources, Remote Computer Sound was set to "Bring to this computer."
But sound via the terminal services connection was not working. Reading up on this very nice Win2K3 tutorial site:
http://www.visualwin.com/Audio-Mapping/
I saw that I was missing the server side configuration. What you want to do is open up the Terminal Services Configuration applet (either under Control Panel -> Administration -> Terminal Services Configuration or Start -> Run -> tscc.msc) and select Properties on the RDP-Tcp connection.

Therein, select the Client Settings tab and under the "Disable the following" section, uncheck Audio Mapping. In order for the new setting to take effect, once you uncheck this setting, you'll have to logoff and log back onto your remote server.

Et Voila! You'll have sound through your RDP session!
Go Obama!
Saturday, January 17, 2009
VMware clone and IIS 6.0 SSL problem
Yesterday, we cloned our first virtual machine running Win2K3 that uses IIS 6.0 and runs multiple websites via separate IP addresses. The clone process went smoothly: the new VM was assigned a new IP address and hostname and the IWAM and IUSR accounts and permissions migrated to that new machine name. However, during testing, we encountered a problem with the SecureBindings in the IIS metabase.
Because this VM had multiple websites in IIS configured, the SecureBindings setting in the IIS metabase (c:\windows\system32\inetsrv\metabase.xml) kept the old IP address information that was configured in the source VM. I'm not sure if this is caused by VMware or IIS, but the solution is to manually edit SecureBindings in IIS to point the website's SSL to the correct IP.
MS Article on Editing the Metabase
TAG
Because this VM had multiple websites in IIS configured, the SecureBindings setting in the IIS metabase (c:\windows\system32\inetsrv\metabase.xml) kept the old IP address information that was configured in the source VM. I'm not sure if this is caused by VMware or IIS, but the solution is to manually edit SecureBindings in IIS to point the website's SSL to the correct IP.
MS Article on Editing the Metabase
TAG
Tuesday, December 16, 2008
tunneling ssh through proxy server
I needed to create a secure SSH connection to my Fedora box at home. However, I am behind a proxy server at work and SSH doesn't have switches that allow it to get through a proxy. So in combination with ntlmaps and the corkscrew program, Open Source helped me do this in a quick and easy way.
Here's a sample .ssh/config file that works for corkscrew:
sodo@linux-z6tw:~> cat .ssh/config
ProxyCommand /usr/local/bin/corkscrew 0.0.0.0 5865 %h %p
Note the 0.0.0.0. This is because ntlmaps is listening on all ports:
sodo@linux-z6tw:~> NTLM authorization Proxy Server v0.9.9.0.1
Copyright (C) 2001-2004 by Dmitry Rozmanov and others.
Now listening at linux-z6tw on port 5865
sodo@linux-z6tw:~> netstat -na | grep "LISTEN "
tcp 0 0 0.0.0.0:5865 0.0.0.0:* LISTEN
tcp 0 0 0.0.0.0:111 0.0.0.0:* LISTEN
tcp 0 0 0.0.0.0:22 0.0.0.0:* LISTEN
tcp 0 0 127.0.0.1:631 0.0.0.0:* LISTEN
tcp 0 0 127.0.0.1:25 0.0.0.0:* LISTEN
Here is the corkscrew home page:
http://www.agroman.net/corkscrew/
Here is a great instruction set for corkscrew:
http://www.mtu.net/~engstrom/ssh-proxy.php
and here is a second link, just in case:
http://lindesk.com/2007/04/using-ssh-over-a-proxy
Now I am able to securely connect and grab files from my home PC. Yeah!
TAG
Here's a sample .ssh/config file that works for corkscrew:
sodo@linux-z6tw:~> cat .ssh/config
ProxyCommand /usr/local/bin/corkscrew 0.0.0.0 5865 %h %p
Note the 0.0.0.0. This is because ntlmaps is listening on all ports:
sodo@linux-z6tw:~> NTLM authorization Proxy Server v0.9.9.0.1
Copyright (C) 2001-2004 by Dmitry Rozmanov and others.
Now listening at linux-z6tw on port 5865
sodo@linux-z6tw:~> netstat -na | grep "LISTEN "
tcp 0 0 0.0.0.0:5865 0.0.0.0:* LISTEN
tcp 0 0 0.0.0.0:111 0.0.0.0:* LISTEN
tcp 0 0 0.0.0.0:22 0.0.0.0:* LISTEN
tcp 0 0 127.0.0.1:631 0.0.0.0:* LISTEN
tcp 0 0 127.0.0.1:25 0.0.0.0:* LISTEN
Here is the corkscrew home page:
http://www.agroman.net/corkscrew/
Here is a great instruction set for corkscrew:
http://www.mtu.net/~engstrom/ssh-proxy.php
and here is a second link, just in case:
http://lindesk.com/2007/04/using-ssh-over-a-proxy
Now I am able to securely connect and grab files from my home PC. Yeah!
TAG
Wednesday, October 29, 2008
helpful svn commands
Here are some useful subversion commands I'd like to remember. But instead, I'll write them down, cause I'm always forgetting.
The simplest being the ubiquitous "checkout the latest version of the source", using ffmpeg as the example:
svn checkout svn://svn.mplayerhq.hu/ffmpeg/trunk ffmpeg
Here's an example of a command to checkout a specific version of code, where "co" is shorthand for "checkout" and "-r" is the parameter to specify a particular revision number:
svn co -r 12000 svn://svn.mplayerhq.hu/ffmpeg/trunk ffmpeg
After you've downloaded that version, you can check the date stamps on the files by using the following command. The log option shows you dates/time/version numbers of the files in the svn repository. It sorts the code in the repository by date. I then pipe the output to awk to print only the date column and then remove blank lines with sed:
svn log ffmpeg | awk -F"|" '{print $3}' | sed '/^$/d'
that's all I have for now. I will update when I have time,
sodo
The simplest being the ubiquitous "checkout the latest version of the source", using ffmpeg as the example:
svn checkout svn://svn.mplayerhq.hu/ffmpeg/trunk ffmpeg
Here's an example of a command to checkout a specific version of code, where "co" is shorthand for "checkout" and "-r" is the parameter to specify a particular revision number:
svn co -r 12000 svn://svn.mplayerhq.hu/ffmpeg/trunk ffmpeg
After you've downloaded that version, you can check the date stamps on the files by using the following command. The log option shows you dates/time/version numbers of the files in the svn repository. It sorts the code in the repository by date. I then pipe the output to awk to print only the date column and then remove blank lines with sed:
svn log ffmpeg | awk -F"|" '{print $3}' | sed '/^$/d'
that's all I have for now. I will update when I have time,
sodo
Tuesday, October 28, 2008
formatted date in Windows script
I find the output of the full date command in Windows lacking. Thus, I was trying to find a way to date/time stamp a logfile in a Windows batch script.
C:\WINNT>date /t
Tue 10/28/2008
I only wanted YYYYMMDD_HHmm, where
YYYY = four digit year
MM = two digit day
DD = two digit month
HH = two digit hour
mm = two digit minute
So, I needed to combine outputs from both the Windows date and time functions.
My batch script ended up looking like this:
set dt=%date:~-4%%date:~4,2%%date:~7,2%_%time:~0,2%%time:~3,2%
bash "siteBackupAll.sh" | tee log%dt%.txt
In the example above, the resulting script outputs a logfile named:
log20081028_1433.txt
The Windows help for SET is pretty cryptic, much like any Unix man page. You can see all the options for Windows shell programming (variables, operators, expressions, etc) if you type
SET /?
at the command prompt.
Variable expansion in Windows is a little weird. Here is a snip from the help, but essentially, you can act on the expansion of a variable (ie, pluck parts from the output) by using a numbering scheme that will start counting from the left or right, depending on whether the number you specify is positive (start from left) or negative (start from right). In essence, the numbering is much like any programmatic substr (substring) function:
May also specify substrings for an expansion. %PATH:~10,5%would expand the PATH environment variable, and then use only the 5characters that begin at the 11th (offset 10) character of the expandedresult. If the length is not specified, then it defaults to theremainder of the variable value. If either number (offset or length) isnegative, then the number used is the length of the environment variablevalue added to the offset or length specified.
%PATH:~-10%would extract the last 10 characters of the PATH variable.
%PATH:~0,-2%would extract all but the last 2 characters of the PATH variable.
'sodo
C:\WINNT>date /t
Tue 10/28/2008
I only wanted YYYYMMDD_HHmm, where
YYYY = four digit year
MM = two digit day
DD = two digit month
HH = two digit hour
mm = two digit minute
So, I needed to combine outputs from both the Windows date and time functions.
My batch script ended up looking like this:
set dt=%date:~-4%%date:~4,2%%date:~7,2%_%time:~0,2%%time:~3,2%
bash "siteBackupAll.sh" | tee log%dt%.txt
In the example above, the resulting script outputs a logfile named:
log20081028_1433.txt
The Windows help for SET is pretty cryptic, much like any Unix man page. You can see all the options for Windows shell programming (variables, operators, expressions, etc) if you type
SET /?
at the command prompt.
Variable expansion in Windows is a little weird. Here is a snip from the help, but essentially, you can act on the expansion of a variable (ie, pluck parts from the output) by using a numbering scheme that will start counting from the left or right, depending on whether the number you specify is positive (start from left) or negative (start from right). In essence, the numbering is much like any programmatic substr (substring) function:
May also specify substrings for an expansion. %PATH:~10,5%would expand the PATH environment variable, and then use only the 5characters that begin at the 11th (offset 10) character of the expandedresult. If the length is not specified, then it defaults to theremainder of the variable value. If either number (offset or length) isnegative, then the number used is the length of the environment variablevalue added to the offset or length specified.
%PATH:~-10%would extract the last 10 characters of the PATH variable.
%PATH:~0,-2%would extract all but the last 2 characters of the PATH variable.
'sodo
Tuesday, October 14, 2008
Hacked!
This will be a new section on the site that will summarize articles that describe recent exploits that I've noticed occurring on my website. Most of the articles will detail the exploits and how to recognize them. Over time, this post will grow. Pay attention to the date and time of the post to find out when it was last updated.
ISC: SQL Injection hacks
'sodo
ISC: SQL Injection hacks
'sodo
Saturday, October 04, 2008
vnc on linux won't connect to mac
I wanted to logon to my Mac via my Fedora 7 installation. Unfortunately, connecting to a mac from a linux box using RealVNC doesn't work:
http://www.realvnc.com/pipermail/vnc-list/2006-March/054423.html
After a bit of Googling, TightVNC seemed to be the ticket. Unfortunately, the VNC and TightVNC libraries conflict:
[root@ogre ~]# rpm -ivh tightvnc-1.3.9-1.i386.rpm
Preparing... ########################################### [100%]
file /usr/share/man/man1/vncviewer.1.gz from install of tightvnc-1.3.9-1 conflicts with file from package vnc-4.1.2-20.fc7
Therefore, I yanked out the RealVNC libraries:
[root@ogre ~]# yum remove vnc*
Loading "installonlyn" plugin
Setting up Remove Process
Resolving Dependencies
--> Running transaction check
---> Package vnc-server.x86_64 0:4.1.2-19.fc7 set to be erased
---> Package vnc.x86_64 0:4.1.2-20.fc7 set to be erased
---> Package vnc-libs.x86_64 0:4.1.2-19.fc7 set to be erased
---> Package vnc-reflector.x86_64 0:1.2.4-3.fc7 set to be erased
---> Package vnc-ltsp-config.noarch 0:4.0-3 set to be erased
---> Package vnc-libs.i386 0:4.1.2-19.fc7 set to be erased
..downloaded Fedora Core 6 tightvnc rpm from here:
http://www.tightvnc.com/download.html
..and installed the Core 6 libraries (though I run Fedora 7) just fine:
[root@ogre ~]# rpm -ivh tightvnc-1.3.9-1.i386.rpm
Preparing... ########################################### [100%]
1:tightvnc ########################################### [100%]
Now my Fedora box can logon to my Mac using TightVNC:
[root@ogre ~]# vncviewer macwired
Connected to RFB server, using protocol version 3.8
Performing standard VNC authentication
Password:
Authentication successful
Desktop name "MACLT"
VNC server default format:
32 bits per pixel.
Least significant byte first in each pixel.
True colour: max red 255 green 255 blue 255, shift red 16 green 8 blue 0
Warning: Cannot convert string "-*-helvetica-bold-r-*-*-16-*-*-*-*-*-*-*" to type FontStruct
Using default colormap which is TrueColor. Pixel format:
32 bits per pixel.
Least significant byte first in each pixel.
True colour: max red 255 green 255 blue 255, shift red 16 green 8 blue 0
Using shared memory PutImage
ShmCleanup called

Yeehaw!
'sodo
http://www.realvnc.com/pipermail/vnc-list/2006-March/054423.html
After a bit of Googling, TightVNC seemed to be the ticket. Unfortunately, the VNC and TightVNC libraries conflict:
[root@ogre ~]# rpm -ivh tightvnc-1.3.9-1.i386.rpm
Preparing... ########################################### [100%]
file /usr/share/man/man1/vncviewer.1.gz from install of tightvnc-1.3.9-1 conflicts with file from package vnc-4.1.2-20.fc7
Therefore, I yanked out the RealVNC libraries:
[root@ogre ~]# yum remove vnc*
Loading "installonlyn" plugin
Setting up Remove Process
Resolving Dependencies
--> Running transaction check
---> Package vnc-server.x86_64 0:4.1.2-19.fc7 set to be erased
---> Package vnc.x86_64 0:4.1.2-20.fc7 set to be erased
---> Package vnc-libs.x86_64 0:4.1.2-19.fc7 set to be erased
---> Package vnc-reflector.x86_64 0:1.2.4-3.fc7 set to be erased
---> Package vnc-ltsp-config.noarch 0:4.0-3 set to be erased
---> Package vnc-libs.i386 0:4.1.2-19.fc7 set to be erased
..downloaded Fedora Core 6 tightvnc rpm from here:
http://www.tightvnc.com/download.html
..and installed the Core 6 libraries (though I run Fedora 7) just fine:
[root@ogre ~]# rpm -ivh tightvnc-1.3.9-1.i386.rpm
Preparing... ########################################### [100%]
1:tightvnc ########################################### [100%]
Now my Fedora box can logon to my Mac using TightVNC:
[root@ogre ~]# vncviewer macwired
Connected to RFB server, using protocol version 3.8
Performing standard VNC authentication
Password:
Authentication successful
Desktop name "MACLT"
VNC server default format:
32 bits per pixel.
Least significant byte first in each pixel.
True colour: max red 255 green 255 blue 255, shift red 16 green 8 blue 0
Warning: Cannot convert string "-*-helvetica-bold-r-*-*-16-*-*-*-*-*-*-*" to type FontStruct
Using default colormap which is TrueColor. Pixel format:
32 bits per pixel.
Least significant byte first in each pixel.
True colour: max red 255 green 255 blue 255, shift red 16 green 8 blue 0
Using shared memory PutImage
ShmCleanup called

Yeehaw!
'sodo
Thursday, September 18, 2008
Netgear WNR3500: disappointing
Here is my short review of the Netgear WNR3500.
I initially purchased a Netgear WNR3500 as a replacement for my aging Netgear WGT624. Unfortunately, I had two problems, one of them major, necessitating the return of the device:
1) poor installation process
2) wireless communication drops
The installation process took a lot longer than expected: about 1 1/2 hours. It failed twice: once from an older XP notebook PC and second, from a new Vista machine. I could understand from an older notebook, but the install simply failed on the new Vista box. After resetting my network a number of times, the install finall worked from Vista. Resetting the router to its default settings can be a major pain. I learned a few things from this page:
http://vpncasestudy.com/reset.html
Secondly, as I host a website from my wireless PC, the wireless communication drops were unacceptable. I tried three different versions of the firmware with the same result, wireless network drops. As my older Netgear WGT624 worked from the same location (upstairs about 20 feet away from my wirelessly connected MacBook), I have had to rollback to use the WGT624 and return the WRN 3500. Read more about the ongoing drops and DNS proxy errors here:
http://forum1.netgear.com/showthread.php?t=27966&page=3
On a more positive note, wired connections seemed to work just fine. Also, the administrative interface to the router was 95% the same as my older WGT624, so Netgear did not make me learn new admin commands.
However, my two major issues left me with a sour taste in my mouth and disappointed me, given my positive experience with my older Netgear WGT624. Too bad. I was looking forward to blazing RangeMax, 802.11n wireless speeds. What I got was network drops. Blecch!
A Bummed Cacasodo
I initially purchased a Netgear WNR3500 as a replacement for my aging Netgear WGT624. Unfortunately, I had two problems, one of them major, necessitating the return of the device:
1) poor installation process
2) wireless communication drops
The installation process took a lot longer than expected: about 1 1/2 hours. It failed twice: once from an older XP notebook PC and second, from a new Vista machine. I could understand from an older notebook, but the install simply failed on the new Vista box. After resetting my network a number of times, the install finall worked from Vista. Resetting the router to its default settings can be a major pain. I learned a few things from this page:
http://vpncasestudy.com/reset.html
Secondly, as I host a website from my wireless PC, the wireless communication drops were unacceptable. I tried three different versions of the firmware with the same result, wireless network drops. As my older Netgear WGT624 worked from the same location (upstairs about 20 feet away from my wirelessly connected MacBook), I have had to rollback to use the WGT624 and return the WRN 3500. Read more about the ongoing drops and DNS proxy errors here:
http://forum1.netgear.com/showthread.php?t=27966&page=3
On a more positive note, wired connections seemed to work just fine. Also, the administrative interface to the router was 95% the same as my older WGT624, so Netgear did not make me learn new admin commands.
However, my two major issues left me with a sour taste in my mouth and disappointed me, given my positive experience with my older Netgear WGT624. Too bad. I was looking forward to blazing RangeMax, 802.11n wireless speeds. What I got was network drops. Blecch!
A Bummed Cacasodo
Sunday, September 14, 2008
install and review of Yougle for VMC
Background
One of the major things I wanted to do was integrate all my media as well as Internet TV like Joost, YouTube, Veoh, Brightcove, etc, into Vista Media Center. An industrious programmer from Australia has been working on such a program called Yougle (http://push-a-button.com/products/youglevista/) that integrates a variety of online video sources, as well as audio sources (like Live365 Internet radio), picture sites (Flickr, of course) and animations. From my perspective, he hits the big one by getting YouTube working within VMC.
Review
The install of the January 2008 build of the software was relatively painless (described in more detail below). Be aware that you will need to install ffdshow for some necessary codecs.
Update 9/17/2008
The install for the new WIP build seems to hang for about a minute or two on the initial timebar of the install. I then let it sit for those few minutes. The install then continues and installs normally. Not sure what the installer is doing at this point to be hanging like that. If you experience problems, perhaps just let the installer sit for a few minutes to see if that helps. FYI - My box is a P4, 3.2Ghz box w/2GB mem & 500GB SATA internal
Another caveat is that since I've installed TV Pack 2008 for VMC, I needed to fake the Yougle installer into thinking I was on an older version of Media Center. TV Pack changes the version (identity) of Media Center from 5.0 to 5.1. If you have TV Pack installed, the thread below shows the registry edit you'll need to make to get this working:
http://push-a-button.com/community/index.php?topic=336
For video, I've explored YouTube, MSN Soapbox and South Park. Initially, I had some problems with YouTube videos hanging after the first couple of vids loaded. Reading some of the Yougle Forums, there is an "embedded" setting within Yougle. Switching to "embedded" seemed to fix the problem. Here is how to tell whether your videos are playing natively or embedded:
http://push-a-button.com/community/index.php?topic=221.0
Update 9/18/2008
I also noticed that I lost my sound in Yougle/YouTube for the simple, silly reason that I inadvertantly pressed "mute" on the YouTube flash player. Stupid mistake, but it kept me busy troubleshooting for about 15 minutes.
Otherwise, YouTube and MSN are working as advertised. Which is great.
Update 9/17/2008
Actually, the most stable YouTube player option in Yougle is "YouTube Embedded w/ Minimize". I played around for a few hours last night without losing the YouTube player behind VMC. Awesome!
One drawback is that searching YouTube within Yougle doesn't seem to pull up the same results as a YouTube search executed within a browser. The search is based off of YouTube's RSS feeds. Unfortunately, when I used the search function, I couldn't find some of my favorite videos. The developer was kind enough to research this conundrum. Also, when I added South Park as a video source, none of the South Park videos played properly. Specifically, I waited and waited for the embedded player to move from the rotating timer icon to actually start playing the video, but this never happened. A similar thing also happened with the animations. I assume these problems aren't due to a slow Internet connection, as I am hard wired into a 6MB Comcast connection. I will explore these problems later.
For audio, Live365 is spotty at best. I could only tune in one out of ten stations that I tried. I tested various Internet radio stations after midnight on Monday morning, but I don't think the timeframe should have any impact. I will explore this more in-depth later.
For pictures, the Flickr integration is excellent. High resolution imagery from Flickr looks great on an HDTV.
In sum, Yougle isn't perfect, but it is a great start to be able to view YouTube vids in VMC. I'm psyched to start using this on an ongoing basis. Of course, I will update this thread with more information as I go through the discovery process.
Kudos to Push-a-Button for some fine work!
Installation
The install process is relatively simple:
1) install ffdshow
2) install Yougle
* if you've installed TV Pack 2008 for VMC, you'll need to make a registry tweak to get Yougle working
** note that support for 64-bit Vista is in test mode as of 9/15/2008:
http://push-a-button.com/community/index.php?topic=338.0
Here's a bit more about the install process:
1) Install ffdshow
- I decided to install the latest stable release, from 12/01/2006
2) Download the older, more stable version of Yougle here:
http://push-a-button.com/downloads/details.php?id=11
or download the most recent Work In Progress from the Announcements section on the Forum:
http://push-a-button.com/community/index.php?board=2.0
I chose to download the more stable version for now.
ffdshow install process
Initial download of v.610 (20061201) here:
http://www.afterdawn.com/software/video_software/codecs_and_filters/ffdshow.cfm/rev__610__20061201
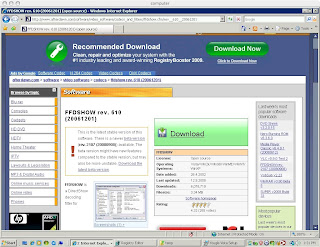
Click "Download"
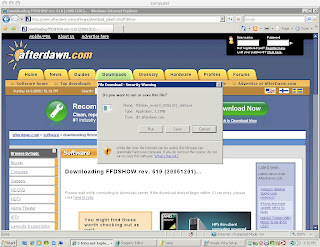
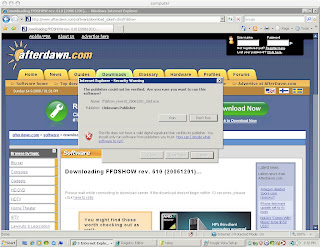
Run Installer
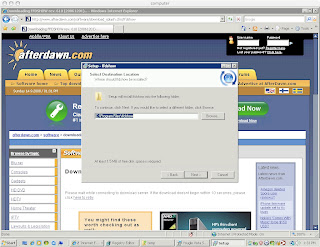
Accept default directory for install
Accept default components
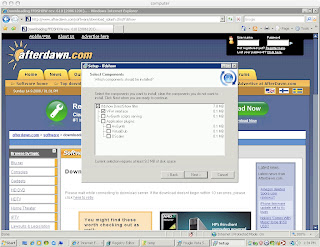
Select Start Menu folder
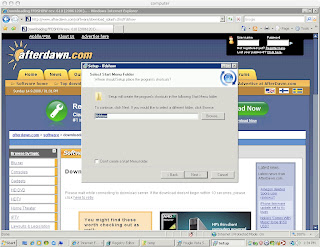
Select the default Additional Tasks
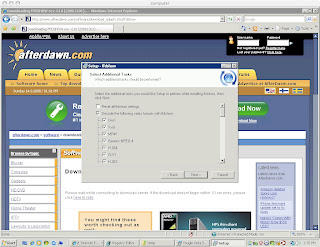
Select default speaker setup, unless you have something other than two channel stereo
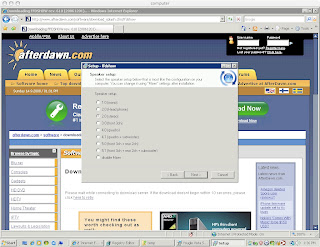
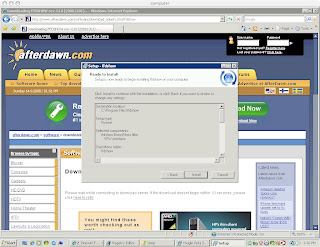
Ready to Install!
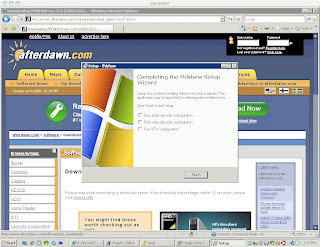
Installed! Go ahead and click Finish
Yougle install process and registry edit needed with TV Pack 2008
Download page
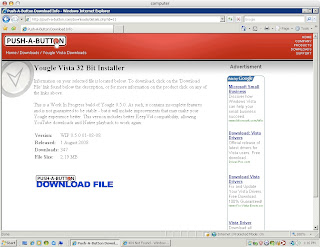
Click Download
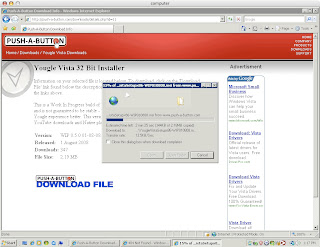
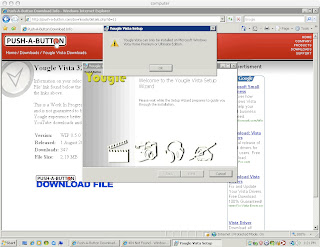
TV Pack 2008 error
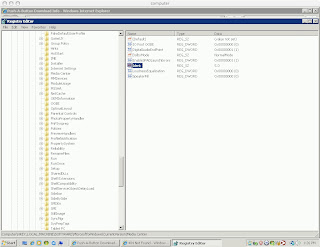
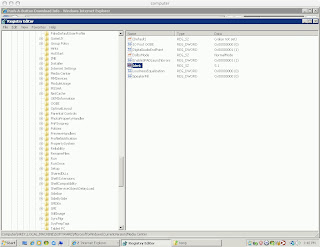
Registry Key for TV Pack 2008..set Ident to 5.0
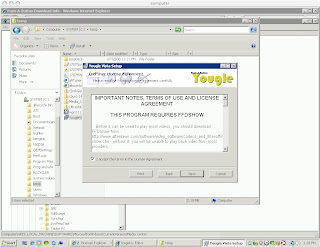
Once key is edited, restart Yougle setup..now it runs!
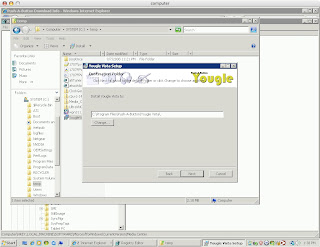
Select default directory for install
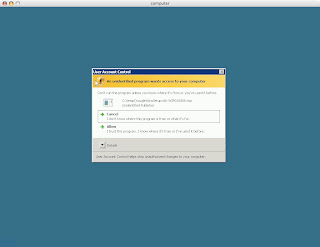
Vista may show a user account control error message like this one..press Allow!
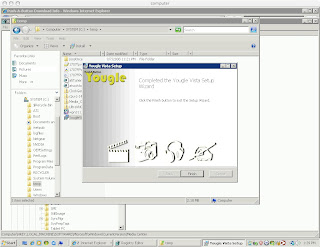
Yougle install runs and is finished rather quickly! Click finish.
Reset MediaCenter version back to 5.1 in regedit
Enjoy!
'sodo
One of the major things I wanted to do was integrate all my media as well as Internet TV like Joost, YouTube, Veoh, Brightcove, etc, into Vista Media Center. An industrious programmer from Australia has been working on such a program called Yougle (http://push-a-button.com/products/youglevista/) that integrates a variety of online video sources, as well as audio sources (like Live365 Internet radio), picture sites (Flickr, of course) and animations. From my perspective, he hits the big one by getting YouTube working within VMC.
Review
The install of the January 2008 build of the software was relatively painless (described in more detail below). Be aware that you will need to install ffdshow for some necessary codecs.
Update 9/17/2008
The install for the new WIP build seems to hang for about a minute or two on the initial timebar of the install. I then let it sit for those few minutes. The install then continues and installs normally. Not sure what the installer is doing at this point to be hanging like that. If you experience problems, perhaps just let the installer sit for a few minutes to see if that helps. FYI - My box is a P4, 3.2Ghz box w/2GB mem & 500GB SATA internal
Another caveat is that since I've installed TV Pack 2008 for VMC, I needed to fake the Yougle installer into thinking I was on an older version of Media Center. TV Pack changes the version (identity) of Media Center from 5.0 to 5.1. If you have TV Pack installed, the thread below shows the registry edit you'll need to make to get this working:
http://push-a-button.com/community/index.php?topic=336
For video, I've explored YouTube, MSN Soapbox and South Park. Initially, I had some problems with YouTube videos hanging after the first couple of vids loaded. Reading some of the Yougle Forums, there is an "embedded" setting within Yougle. Switching to "embedded" seemed to fix the problem. Here is how to tell whether your videos are playing natively or embedded:
http://push-a-button.com/community/index.php?topic=221.0
Update 9/18/2008
I also noticed that I lost my sound in Yougle/YouTube for the simple, silly reason that I inadvertantly pressed "mute" on the YouTube flash player. Stupid mistake, but it kept me busy troubleshooting for about 15 minutes.
Otherwise, YouTube and MSN are working as advertised. Which is great.
Update 9/17/2008
Actually, the most stable YouTube player option in Yougle is "YouTube Embedded w/ Minimize". I played around for a few hours last night without losing the YouTube player behind VMC. Awesome!
One drawback is that searching YouTube within Yougle doesn't seem to pull up the same results as a YouTube search executed within a browser. The search is based off of YouTube's RSS feeds. Unfortunately, when I used the search function, I couldn't find some of my favorite videos. The developer was kind enough to research this conundrum. Also, when I added South Park as a video source, none of the South Park videos played properly. Specifically, I waited and waited for the embedded player to move from the rotating timer icon to actually start playing the video, but this never happened. A similar thing also happened with the animations. I assume these problems aren't due to a slow Internet connection, as I am hard wired into a 6MB Comcast connection. I will explore these problems later.
For audio, Live365 is spotty at best. I could only tune in one out of ten stations that I tried. I tested various Internet radio stations after midnight on Monday morning, but I don't think the timeframe should have any impact. I will explore this more in-depth later.
For pictures, the Flickr integration is excellent. High resolution imagery from Flickr looks great on an HDTV.
In sum, Yougle isn't perfect, but it is a great start to be able to view YouTube vids in VMC. I'm psyched to start using this on an ongoing basis. Of course, I will update this thread with more information as I go through the discovery process.
Kudos to Push-a-Button for some fine work!
Installation
The install process is relatively simple:
1) install ffdshow
2) install Yougle
* if you've installed TV Pack 2008 for VMC, you'll need to make a registry tweak to get Yougle working
** note that support for 64-bit Vista is in test mode as of 9/15/2008:
http://push-a-button.com/community/index.php?topic=338.0
Here's a bit more about the install process:
1) Install ffdshow
- I decided to install the latest stable release, from 12/01/2006
2) Download the older, more stable version of Yougle here:
http://push-a-button.com/downloads/details.php?id=11
or download the most recent Work In Progress from the Announcements section on the Forum:
http://push-a-button.com/community/index.php?board=2.0
I chose to download the more stable version for now.
ffdshow install process
Initial download of v.610 (20061201) here:
http://www.afterdawn.com/software/video_software/codecs_and_filters/ffdshow.cfm/rev__610__20061201

Click "Download"

Run Installer

Accept default directory for install

Accept default components

Select Start Menu folder

Select the default Additional Tasks

Select default speaker setup, unless you have something other than two channel stereo

Ready to Install!

Installed! Go ahead and click Finish

Yougle install process and registry edit needed with TV Pack 2008
Download page

Click Download

TV Pack 2008 error

Registry Key for TV Pack 2008..set Ident to 5.0

Once key is edited, restart Yougle setup..now it runs!

Select default directory for install

Vista may show a user account control error message like this one..press Allow!

Yougle install runs and is finished rather quickly! Click finish.

Reset MediaCenter version back to 5.1 in regedit

Enjoy!
'sodo
Thursday, September 11, 2008
command line date time change
Or how to set the time in Linux.
Here's another thing I always forget: how to change the date or time at the command line, preferably using the Bourne shell in Linux.
Example:
To change the date/time on a Linux box to September 10, 2008 at 5:37pm, enter the following:
date 0910173708
The ordering of the fields is a bit odd, so pay attention.
where the date/time format is the following:
MMDDHHmmYY
MM - two digit month
DD - two digit day
HH - two digit hour
mm - two digit minute
YY - two digit year
All are zero padded if date/time values are below 10.
Changing the date time was never easier!
enjoy,
sodo
Here's another thing I always forget: how to change the date or time at the command line, preferably using the Bourne shell in Linux.
Example:
To change the date/time on a Linux box to September 10, 2008 at 5:37pm, enter the following:
date 0910173708
The ordering of the fields is a bit odd, so pay attention.
where the date/time format is the following:
MMDDHHmmYY
MM - two digit month
DD - two digit day
HH - two digit hour
mm - two digit minute
YY - two digit year
All are zero padded if date/time values are below 10.
Changing the date time was never easier!
enjoy,
sodo
Tuesday, September 09, 2008
500 errors from IIS and Oracle
For the past couple of years, the Microsoft Win2K/Win2K3 website that I support had been plagued with 500 errors and subsequent IIS resets. Our website is a combination of custom ASP and ASP.net code running on 32-bit Windows, connecting via ODBC driver to an Oracle 9.2.0.7 backend on Solaris. The side effect to our customers of IIS blowing up is that for a short period of time (less than an hour, usually), customers would see a number of these 500 server errors from the server that panicked. Usually, this was not much of a problem, as it happened on one or two servers once or twice per day and the number of errors was low. The workaround was to reset IIS.
Recently, we added more servers into our web farm and the problem happened more often, with a greater number of 500 errors being spit out when one of these newer, more powerful machines' IIS process loses its mind. So, we contacted Microsoft and used DebugDiag to setup a crash/hang dump to find out what memory threads were in play when IIS died.
Sending this information to Microsoft, Microsoft engineers pointed to an interaction between IIS and Oracle. Specifically, there were pointers to the 9.2.0.7 Oracle ODBC driver that we use to connect our web application to our database. In the past, we have had very little luck with Oracle being able to solve any driver related issues for us. But we know that the first thing Oracle Support will ask for is "do you have the latest driver set installed." Knowing that Oracle was going to require this of us, we started the process of upgrading the driver from 9i to 10G (10.2.0.4) in our development environment. More specifically, we needed the following:
- the Oracle 10G client (1GB)
- the 6810189 patch set for 32-bit Windows (1GB)
- the 7218676 patch set for 32-bit Windows (67MB)
The install is quite large. Our very basic install took about 500MB of disk space. Once we got the new 10G drivers and patch set installed in development, we put it through a gamut of tests. It seemed to work fine, but development is no substitute for production traffic on a site that gets millions of hits every day. So, we started rolling out the new drivers to the most problematic web servers.
The first week was very tense, as we let the drivers cook on one server. Previously, this server blew up at least once or twice a day. With the new drivers in place, two days went by without IIS experiencing a problem. Three days went by. Then an entire week went by without a problem! We were psyched! We started rolling out the driver to the rest of the eighteen web servers, two servers every two days.
After a week went by, we could tell that the number of 500 errors and IIS resets were diminishing. After a second week went by, we were about half way through the lot, with every decreasing numbers of 500 errors. Best of all, the boxes that were patched weeks back had not reset themselves. This was unheard of! After using Oracle drivers for eight years, this was the only time in the history of our website that we were not seeing 500 errors! Fabulous!
We finished upgrading from 9.2.0.7 to 10.2.0.4 a couple weeks later and are EXTREMELY happy to report that we no longer are experience IIS resets and blasts of 500 errors.
Thank you Oracle, for finally fixing this issue!
Recently, we added more servers into our web farm and the problem happened more often, with a greater number of 500 errors being spit out when one of these newer, more powerful machines' IIS process loses its mind. So, we contacted Microsoft and used DebugDiag to setup a crash/hang dump to find out what memory threads were in play when IIS died.
Sending this information to Microsoft, Microsoft engineers pointed to an interaction between IIS and Oracle. Specifically, there were pointers to the 9.2.0.7 Oracle ODBC driver that we use to connect our web application to our database. In the past, we have had very little luck with Oracle being able to solve any driver related issues for us. But we know that the first thing Oracle Support will ask for is "do you have the latest driver set installed." Knowing that Oracle was going to require this of us, we started the process of upgrading the driver from 9i to 10G (10.2.0.4) in our development environment. More specifically, we needed the following:
- the Oracle 10G client (1GB)
- the 6810189 patch set for 32-bit Windows (1GB)
- the 7218676 patch set for 32-bit Windows (67MB)
The install is quite large. Our very basic install took about 500MB of disk space. Once we got the new 10G drivers and patch set installed in development, we put it through a gamut of tests. It seemed to work fine, but development is no substitute for production traffic on a site that gets millions of hits every day. So, we started rolling out the new drivers to the most problematic web servers.
The first week was very tense, as we let the drivers cook on one server. Previously, this server blew up at least once or twice a day. With the new drivers in place, two days went by without IIS experiencing a problem. Three days went by. Then an entire week went by without a problem! We were psyched! We started rolling out the driver to the rest of the eighteen web servers, two servers every two days.
After a week went by, we could tell that the number of 500 errors and IIS resets were diminishing. After a second week went by, we were about half way through the lot, with every decreasing numbers of 500 errors. Best of all, the boxes that were patched weeks back had not reset themselves. This was unheard of! After using Oracle drivers for eight years, this was the only time in the history of our website that we were not seeing 500 errors! Fabulous!
We finished upgrading from 9.2.0.7 to 10.2.0.4 a couple weeks later and are EXTREMELY happy to report that we no longer are experience IIS resets and blasts of 500 errors.
Thank you Oracle, for finally fixing this issue!
Sunday, August 17, 2008
performance problems with HD viewing in Media Center resolved
This is a follow up to my first three posts:
Vista View Saber DA-1N1-I tuner and Media Center
Vista 32-bit, First Impressions
Making Sense of Home Theatre PCs
Background
I had quite a battle over the past couple of days. The goal was to get a working Vista Media Center that did not choke while displaying live, HDTV content. First, I have to say that Microsoft has done a kick ass job with Media Center. It has taken a number of years, but the Media Center interface is really slick and easy to use, the content and functionality deep and the possibilities pretty open, given the way they've designed it. You can even download an SDK for it, which is cool.
In practice, however, getting Media Center to work on older equipment is challenging and frustrating for the newcomer. The interesting thing is the base system I started with ("started with"..yuk, yuk) was no slouch:
The Problem
The main problem was that when I viewed live HDTV channels, I would get drop outs and compression artifacts.
As you know, I had already completed the base Vista install, installed aVista View Saber DA-1N1-I tuner card and layered the latest and greatest Media Center with TVPack update on top of it.
There were a couple links to the Media Center TV Pack Unofficial Download on Engadget's site here. I've plucked out a couple of links to download TV Pack 2008 here, but I'm not sure how long they will be valid:
http://rapidshare.com/files/136020246/MediaCenterTVPack2008-KB953272-x64.zip.html
http://www.avsforum.com/avs-vb/showthread.php?s=b523af4d82ccee06f79c49badff6d2a9&p=14451290#post14451290
http://www.mediafire.com/?sharekey=30d15c758a398fcfd2db6fb9a8902bda
http://rapidshare.com/files/138029257/Media_Center_TV_Pack_2008.rar.html
The neat thing about TVPack with the Vista View tuner is that, among many other things it did, was resolve tricky problems with displaying the correct listings in the TV Guide if you have multiple channel sources (ie, cable and antenna signal inputs), as well as add support for clear QAM (quadrature amplitude modulation) channels. QAM channels are the HD channels that a TV provider will send "in the clear" over the cable line. In my case, Media Center sees about 14 clear QAM channels from Comcast.
Tuner Setup
I have a three way splitter in my upstairs loft that splits the cable signal three ways: one to the analog, NTSC connection on the TV tuner card, one to the digital, ATSC connection on the tuner card and one to the cable modem itself. Because I was getting drops, I thought that I was just getting a weak signal. I removed the splitter and plugged the feed directly into the digital connection on the tuner card. No luck, as the signal still broke up.
Initial Performance Stats
Taking a look at the new Reliability and Performance Monitor in Vista (quite nice, really) while an HDTV show was being displayed in MC, I saw that CPU was being driven close to 100% on my hyperthreaded system. Peaking on CPU is never good. I thought the problem could be my video card not offloading enough load from the CPU. Maybe the ATI card was unpowered to the task? I removed it and installed an NVidia 7600GS that I had laying around. Symptoms were the same with the new card.
So far, the evidence showed that the problem was not in the source signal or video card since:
1) the input source signal was clean
2) a capable video card was choking in the same way as an older one
Reviewing Performance Monitor, the disk seemed to be quite busy. I assumed this was due to the live tv buffer that MediaCenter keeps while you watch programs. To explain, MediaCenter has the same ability as a regular consumer DVR, in that it buffers live tv in order to allow the viewer to playback the last few minutes of a program. This rewind feature is supported by the system writing huge files to disk.
I should have pulled up some disk queue stats to confirm, but I had a gut feeling that the problem was in the disk subsystem. Looking at the disk reads and writes in Performance Monitor, I saw that about 4MB of data were being written to and read from the hard drive every second while an HD program was being shown. My current hard drive was a 120GB IDE. IDE throughput is pretty weak by today's standards. Hmmm..this old drive has to go. So, I was off to the nearest store to get a hard drive.
Throwing Money At It Will Solves the Problem!
*** BEGIN DIVERSION ***
In a pinch, Staples is my closest source of computer parts. Of course, it is not the best choice for prices. Oh well, I was on a mission. Seagate 500GB SATA ..$130. Eeesh. That is a little too much. I patiently waited for the computer department rep to finish his conversation with another customer. I'm glad I did. I overheard that Staples supported price matching. I scrambled to find a machine with an open internet connection. Finding one, I Googled "site:bestbuy.com seagate 500GB SATA". Lo and behold, they had the very same drive for $90! Great! At the register, the clerk had to confirm the price. I noticed his point of sale system had web browsing directly built in. But he confirmed the price..$40 saved!
*** END DIVERSION ***
I ran home and installed the drive. Reading through the installation manual, I saw that Seagate has Disk Wizard, which allows you to format your new drive. It also had an option I hadn't seen before..to clone an older drives' contents onto a newer one. Psych! I was expecting to have to reinstall Vista, but if this Acronis clone software actually worked, I wouldn't have to go through that pain.
New Drive Fun
I installed the drive in the PC and got Disk Wizard running. Selecting the appropriate clone options, clone was to copy the old drives' content, sets the master boot record and reboot. Hitting "go", I saw that the clone ran very quickly, almost too quick, and then asked me to reboot. I figured the process must do the cloning on reboot, but when the box rebooted, the OS did not boot. Oh sh1t. I hope it hadn't blown away my Vista install. Googling for people with similar problems, I learned from someone else's issue that clone changes the master boot record, so my system trying to read off the new disk. Since the clone process didn't go as expected, there was no operating system for the master boot record to access. Luckily, clone did not touch the original system disk, so after unplugging the new one, I was able to verify my base Vista system was still alive.
Starting Disk Wizard again, I saw it had a bootable install version of the clone process. Since the initial Vista install process did not work, I thought I'd give this a shot. I burned an ISO to a CD and started up the clone process. This time, I saw progress on the clone procedure meter. It took about 17 minutes to clone 24GB of data from a 120GB IDE to my new 500GB Seagate. After the clone process was complete, the box rebooted. While the box rebooted, I made sure to shut down the box entirely and take the original system disk offline. After doing this, I restarted the system and was overjoyed to see Vista start booting. New drive works with my old install of Media Center! Yay!
Did the New Drive Help?
Moment of truth. I pulled up Media Center with some live HDTV. I still had dropouts even with the new, faster drive. Damn! OK. Since you can't turn off Live TV easily in MediaCenter (why would I want to, with Olympic Volleyball coming up?), I decided to meet the burden head on by using my old IDE RAID card and setup a stripe set of old hard drives. I had two 120GB lying around (the one old system disk plus another), so I installed the card, setup the RAID set in the BIOS and formatted the new RAID set when it came up in Vista. Voila! Lots of fast disk capacity on hand! Now to repoint the destination directory for the live hd temporary files to the RAID set.
Move those Temp Files!
In Media Center, I saw that there was no easy way to turn off the Live TV feature. So I figured the location of the temp file directory was in the registry. Reviewing the Disk statistics of Reliability and Performance Monitor more closely, PerfMon actually shows the location of the directory where disk access (reads and writes) are occurring. Sweet! Looking at the details of the offending process, I saw that this directory was the culprit of most of the reads and writes:
C:\Users\Public\Recorded TV\TempRec\TempSBE
Cool. I searched on this string in regedit, found the appropriate location:
HKEY_LOCAL_MACHINE\SOFTWARE\Microsoft\Windows\CurrentVersion\Media Center\Service\Video\Tuners\DVR\IO\Writer
Then, I tweaked the values to match a new directory that I setup on the D:. I restarted Media Center for the change to take effect and waited patiently for live HD to come up. Watching it, I saw that HD was definetly smoother, but not perfect. It still hiccupped from time to time. DAMMIT! Looking at the top CPU consumers in Task Manager, I saw that dwm.exe (Desktop Window Manager) kept popping up, albeit with low CPU consumptions of 5-7%. More performance tuning necessary.
Optimizing Media Center Performance
The key to getting Media Center working right is optimizing performance in Vista. Here are a few articles that helped me do that, in order of most useful:
ExtremeTech article
Andrew Grant's blog
APCmag.com article
Jwyse's blog
Also, the following article has some registry tweaks to get your Media Center setup just the way you like it:
MediaCenter.com.au article
One feature that I had kept running in Vista was the Aero interface with a sidebar of gadgets (clock, RSS news feed and rotating pictures). Apparently, the process dwm.exe controls the display of these visual effects and gadgets. In Control Panel -> Personalization -> Window Colors and Appearance, I disabled the Aero interface by selecting "Windows Standard" as the color scheme. After the change, I checked live HD. There were less drops, but still an occasional one every fifty seconds or so. Damn! On a hunch, I disabled the RSS news feed that was in the sidebar under the clock. Restarting Media Center, I watched for any live HD dropouts. One minute went by..no problem. Two minutes..no problem. Three minutes..no drops. Awesome! I think I've got the problem licked!
Right now, I've had live HDTV (the Olympics) running for four hours. There seems to be a barely noticeable lag sometimes when replaying the live HDTV buffer. I believe this is due, again, to disk access. I may add a third 7200RPM 80GB drive to my stripe set to improve performance. I will let you know how that goes.
Conclusions
In general, if you are skirting the edge of recommended hardware for HD viewing, Media Center seems VERY sensitive to any processes taking up CPU or mouse movements. Disabling any CPU performance hogs is essential in order to have live, HDTV in Vista Media Center run properly on an older system. If I want a perfectly clear HD viewing experience with no dropouts, I will not open ANY programs. Also, I don't have any programs running that update the display, like Task Manager or Performance monitor. In fact, I won't even touch the mouse if I want undisturbed video. Media Center a bit touchy, eh?
I assume if I had a new dual or quad core box with a fast CPU, the latest memory, a 1333Mhz front side bus, PCI Express video card and all SATA, I wouldn't have these problems. But I didn't feeling like paying an arm and a leg for a new box. With my trusty old Dell 400SC, I may be able to get by adding a $100 tuner and $100 hard drive only. Time will tell!
In sum, once Media Center is running well, it IS pretty sweet. Now to find a usable remote for VMC. Any suggestions?
:)
Vista View Saber DA-1N1-I tuner and Media Center
Vista 32-bit, First Impressions
Making Sense of Home Theatre PCs
Background
I had quite a battle over the past couple of days. The goal was to get a working Vista Media Center that did not choke while displaying live, HDTV content. First, I have to say that Microsoft has done a kick ass job with Media Center. It has taken a number of years, but the Media Center interface is really slick and easy to use, the content and functionality deep and the possibilities pretty open, given the way they've designed it. You can even download an SDK for it, which is cool.
In practice, however, getting Media Center to work on older equipment is challenging and frustrating for the newcomer. The interesting thing is the base system I started with ("started with"..yuk, yuk) was no slouch:
- Dell 400SC, 3.2Ghz
- 2GB PC3200 mem
- 128MB ATI All-in-Wonder 9800 Pro AGP 4x card
- 120GB 7200RPM IDE system drive
The Problem
The main problem was that when I viewed live HDTV channels, I would get drop outs and compression artifacts.
As you know, I had already completed the base Vista install, installed aVista View Saber DA-1N1-I tuner card and layered the latest and greatest Media Center with TVPack update on top of it.
There were a couple links to the Media Center TV Pack Unofficial Download on Engadget's site here. I've plucked out a couple of links to download TV Pack 2008 here, but I'm not sure how long they will be valid:
http://rapidshare.com/files/136020246/MediaCenterTVPack2008-KB953272-x64.zip.html
http://www.avsforum.com/avs-vb/showthread.php?s=b523af4d82ccee06f79c49badff6d2a9&p=14451290#post14451290
http://www.mediafire.com/?sharekey=30d15c758a398fcfd2db6fb9a8902bda
http://rapidshare.com/files/138029257/Media_Center_TV_Pack_2008.rar.html
The neat thing about TVPack with the Vista View tuner is that, among many other things it did, was resolve tricky problems with displaying the correct listings in the TV Guide if you have multiple channel sources (ie, cable and antenna signal inputs), as well as add support for clear QAM (quadrature amplitude modulation) channels. QAM channels are the HD channels that a TV provider will send "in the clear" over the cable line. In my case, Media Center sees about 14 clear QAM channels from Comcast.
Tuner Setup
I have a three way splitter in my upstairs loft that splits the cable signal three ways: one to the analog, NTSC connection on the TV tuner card, one to the digital, ATSC connection on the tuner card and one to the cable modem itself. Because I was getting drops, I thought that I was just getting a weak signal. I removed the splitter and plugged the feed directly into the digital connection on the tuner card. No luck, as the signal still broke up.
Initial Performance Stats
Taking a look at the new Reliability and Performance Monitor in Vista (quite nice, really) while an HDTV show was being displayed in MC, I saw that CPU was being driven close to 100% on my hyperthreaded system. Peaking on CPU is never good. I thought the problem could be my video card not offloading enough load from the CPU. Maybe the ATI card was unpowered to the task? I removed it and installed an NVidia 7600GS that I had laying around. Symptoms were the same with the new card.
So far, the evidence showed that the problem was not in the source signal or video card since:
1) the input source signal was clean
2) a capable video card was choking in the same way as an older one
Reviewing Performance Monitor, the disk seemed to be quite busy. I assumed this was due to the live tv buffer that MediaCenter keeps while you watch programs. To explain, MediaCenter has the same ability as a regular consumer DVR, in that it buffers live tv in order to allow the viewer to playback the last few minutes of a program. This rewind feature is supported by the system writing huge files to disk.
I should have pulled up some disk queue stats to confirm, but I had a gut feeling that the problem was in the disk subsystem. Looking at the disk reads and writes in Performance Monitor, I saw that about 4MB of data were being written to and read from the hard drive every second while an HD program was being shown. My current hard drive was a 120GB IDE. IDE throughput is pretty weak by today's standards. Hmmm..this old drive has to go. So, I was off to the nearest store to get a hard drive.
Throwing Money At It Will Solves the Problem!
*** BEGIN DIVERSION ***
In a pinch, Staples is my closest source of computer parts. Of course, it is not the best choice for prices. Oh well, I was on a mission. Seagate 500GB SATA
..$130. Eeesh. That is a little too much. I patiently waited for the computer department rep to finish his conversation with another customer. I'm glad I did. I overheard that Staples supported price matching. I scrambled to find a machine with an open internet connection. Finding one, I Googled "site:bestbuy.com seagate 500GB SATA". Lo and behold, they had the very same drive for $90! Great! At the register, the clerk had to confirm the price. I noticed his point of sale system had web browsing directly built in. But he confirmed the price..$40 saved!*** END DIVERSION ***
I ran home and installed the drive. Reading through the installation manual, I saw that Seagate has Disk Wizard, which allows you to format your new drive. It also had an option I hadn't seen before..to clone an older drives' contents onto a newer one. Psych! I was expecting to have to reinstall Vista, but if this Acronis clone software actually worked, I wouldn't have to go through that pain.
New Drive Fun
I installed the drive in the PC and got Disk Wizard running. Selecting the appropriate clone options, clone was to copy the old drives' content, sets the master boot record and reboot. Hitting "go", I saw that the clone ran very quickly, almost too quick, and then asked me to reboot. I figured the process must do the cloning on reboot, but when the box rebooted, the OS did not boot. Oh sh1t. I hope it hadn't blown away my Vista install. Googling for people with similar problems, I learned from someone else's issue that clone changes the master boot record, so my system trying to read off the new disk. Since the clone process didn't go as expected, there was no operating system for the master boot record to access. Luckily, clone did not touch the original system disk, so after unplugging the new one, I was able to verify my base Vista system was still alive.
Starting Disk Wizard again, I saw it had a bootable install version of the clone process. Since the initial Vista install process did not work, I thought I'd give this a shot. I burned an ISO to a CD and started up the clone process. This time, I saw progress on the clone procedure meter. It took about 17 minutes to clone 24GB of data from a 120GB IDE to my new 500GB Seagate. After the clone process was complete, the box rebooted. While the box rebooted, I made sure to shut down the box entirely and take the original system disk offline. After doing this, I restarted the system and was overjoyed to see Vista start booting. New drive works with my old install of Media Center! Yay!
Did the New Drive Help?
Moment of truth. I pulled up Media Center with some live HDTV. I still had dropouts even with the new, faster drive. Damn! OK. Since you can't turn off Live TV easily in MediaCenter (why would I want to, with Olympic Volleyball coming up?), I decided to meet the burden head on by using my old IDE RAID card and setup a stripe set of old hard drives. I had two 120GB lying around (the one old system disk plus another), so I installed the card, setup the RAID set in the BIOS and formatted the new RAID set when it came up in Vista. Voila! Lots of fast disk capacity on hand! Now to repoint the destination directory for the live hd temporary files to the RAID set.
Move those Temp Files!
In Media Center, I saw that there was no easy way to turn off the Live TV feature. So I figured the location of the temp file directory was in the registry. Reviewing the Disk statistics of Reliability and Performance Monitor more closely, PerfMon actually shows the location of the directory where disk access (reads and writes) are occurring. Sweet! Looking at the details of the offending process, I saw that this directory was the culprit of most of the reads and writes:
C:\Users\Public\Recorded TV\TempRec\TempSBE
Cool. I searched on this string in regedit, found the appropriate location:
HKEY_LOCAL_MACHINE\SOFTWARE\Microsoft\Windows\CurrentVersion\Media Center\Service\Video\Tuners\DVR\IO\Writer
Then, I tweaked the values to match a new directory that I setup on the D:. I restarted Media Center for the change to take effect and waited patiently for live HD to come up. Watching it, I saw that HD was definetly smoother, but not perfect. It still hiccupped from time to time. DAMMIT! Looking at the top CPU consumers in Task Manager, I saw that dwm.exe (Desktop Window Manager) kept popping up, albeit with low CPU consumptions of 5-7%. More performance tuning necessary.
Optimizing Media Center Performance
The key to getting Media Center working right is optimizing performance in Vista. Here are a few articles that helped me do that, in order of most useful:
ExtremeTech article
Andrew Grant's blog
APCmag.com article
Jwyse's blog
Also, the following article has some registry tweaks to get your Media Center setup just the way you like it:
MediaCenter.com.au article
One feature that I had kept running in Vista was the Aero interface with a sidebar of gadgets (clock, RSS news feed and rotating pictures). Apparently, the process dwm.exe controls the display of these visual effects and gadgets. In Control Panel -> Personalization -> Window Colors and Appearance, I disabled the Aero interface by selecting "Windows Standard" as the color scheme. After the change, I checked live HD. There were less drops, but still an occasional one every fifty seconds or so. Damn! On a hunch, I disabled the RSS news feed that was in the sidebar under the clock. Restarting Media Center, I watched for any live HD dropouts. One minute went by..no problem. Two minutes..no problem. Three minutes..no drops. Awesome! I think I've got the problem licked!
Right now, I've had live HDTV (the Olympics) running for four hours. There seems to be a barely noticeable lag sometimes when replaying the live HDTV buffer. I believe this is due, again, to disk access. I may add a third 7200RPM 80GB drive to my stripe set to improve performance. I will let you know how that goes.
Conclusions
In general, if you are skirting the edge of recommended hardware for HD viewing, Media Center seems VERY sensitive to any processes taking up CPU or mouse movements. Disabling any CPU performance hogs is essential in order to have live, HDTV in Vista Media Center run properly on an older system. If I want a perfectly clear HD viewing experience with no dropouts, I will not open ANY programs. Also, I don't have any programs running that update the display, like Task Manager or Performance monitor. In fact, I won't even touch the mouse if I want undisturbed video. Media Center a bit touchy, eh?
I assume if I had a new dual or quad core box with a fast CPU, the latest memory, a 1333Mhz front side bus, PCI Express video card and all SATA, I wouldn't have these problems. But I didn't feeling like paying an arm and a leg for a new box. With my trusty old Dell 400SC, I may be able to get by adding a $100 tuner and $100 hard drive only. Time will tell!
In sum, once Media Center is running well, it IS pretty sweet. Now to find a usable remote for VMC. Any suggestions?
:)
Tuesday, August 12, 2008
Vista View Saber DA-1N1-I tuner and Media Center
This is a follow up to my first two posts:
Vista 32-bit, First Impressions
Making Sense of Home Theatre PCs
Last night, I spent a few hours experimenting with Windows Media Center on Vista and the new TV Pack, with the goal of getting digital cable from Comcast integrated into Media Center. As suggested from the article linked above, I reinstalled Vista (painfully slow). I then installed the TV Pack and associated hotfixes. That day, I had bought a Vista View Saber DA-1N1-I tuner card. It is PCI, to fit in my older Dell 400SC. I let Vista select the driver from the internet and I saw that it found the latest driver.
Setup in WMC was straightforward, similar to Ben's experience. I connected the card's NTSC connection to my comcast line. After the requisite asking of where Ilived, downloading of my area's TV guide and inspecting my tuners' connection, WMC got me to the point where I could select my area's cable provider. Since I live in NY Metro, there were about ten choices. I selected Comcast in Jersey City. So sure enough, channels 1-99 on Comcast appeared.
I was happy to see I had basic analog connectivity, but wondered where the digital channels went. At the time, I didn't realize that this was regular analog cable from Comcast. I went through the discovery process again, and this time I selected Comcast Digital as my provider. Well, this didn't work, because the cable was plugged into the analog, NTSC connection. In my haste, I hadn't realized that the card I bought is only good for ATSC, over the air HD and NTSC analog cable. It won't get me what I wanted, which was the ability to watch and record unencrypted, clear QAM channels via my Comcast connection. Duh.
Taking my idiocy in stride, I moved on to the ATSC output. When I connected my cable connection to ATSC, as expected, WMC didn't find any channels. I thought I might be able to use the cable coming from the back of the PC as an antenna, so I disconnected the opposite end of the cable from the PC (the splitter end), reran the automatic setup and I was nicely surprised to see that the WMC picked up the local over the air HD channel selection, about 14 channels in my case, directly across the river from Manhattan. Performance was a bit choppy, as my signal wasn't very good in my computer closet. I'm sure with a proper antenna, the signal would be great.
In both cases, analog cable and over the air, WMC picked the correct guide. The guide picked up all the shows, was really nice to navigate through and had lots of supplemental information. Very slick.
Today, I went back to the drawing board and picked up a Hauppauge WinTV HVR-1600 . I'll let you know how this install goes tomorrow.
Long story short, though, if you are looking for a card that works for NTSC and ATSC over the air signals out of the box with this latest update for WMC, the Vista View Saber seems to fit the bill.
UPDATE 8/14/2008
Last Tuesday, VistaView released a QAM patch (a simple registry tweak) for MediaCenter with TVpack to allow the Saber DA-1N1-I to allow you to tune QAM channels on ATSC cable TV: http://www.vistaview.tv/index.php?option=com_docman&task=cat_view&gid=31&Itemid=46
I downloaded the patch and rebooted. I split my cable line to go to both the analog NTSC and digital ATSC jacks on the back of the Vista View card. The positive: during the tuner setup, Media Center now sees both the analog tuner and a new digital cable tuner:
ViXS PureTV Analog TV Tuner
ViXS PureTV ATDC/DVBC Tuner
Continuing through the tuner setup, I can select my provider's (Comcast) channel selection and guide. Checking the source of the channels under Guide -> Edit Channels, I get a mix of the OTA HD channels (about 14 channels) on the Digital Cable connection, but the rest (70 or so) are coming through the analog tuner. The digital channels seem to break up a lot. I imagine using an HD antenna instead of the digital cable would help here, since the digital cable is only getting me those 14 channels. If I hook up only one cable to the ATSC input, I only get those 14 channels. I have had no luck seeing any channels I would normally see with the Comcast Motorola box above 99.
From the Guide -> Edit channels, I see that most of the available channels that are disabled have padlocks next to them and that the source of them is the digital tuner. I imagine the padlocks mean that they are encrypted.
Tonight allowed me to get a bit farther, but am perplexed as to why I'm not seeing any channels above 99. I am a bit of a newbie to this MediaCenter/cable integration stuff. It seems as if Comcast locks everything above 99..not sure right now. Looking at the clear qam guide for my zip code here https://www.silicondust.com/hdhomerun/lineupui?Cmd=LocationProgramsWeb&Country=US&Postcode=07302, I notice that the higher range (above 99) channels that I enjoy watching like Military/VH1 classic/Encore/etc are missing from the list. I guess they are not in clear QAM. Maybe I'm just out of luck?
So, a bit of progress, a bit of disappointment.
UPDATE 8/15/2008
One follow up: I'm a bit disappointed in the performance of HDTV in Media Center w/TV Pack. I've got a Dell SC400 (probably four 1/2 years old) P4, 3.2Ghz, 2GB w/120GB IDE drive and ATI all-in-wonder 9800 pro. Not the latest and greatest, sure, but no slouch box either. Viewing standard def, Media Center drives the box to run at 50% CPU without a problem. Running live HDTV (1280x720), MC runs the box to 100%, at which point I get drop outs. Also, I notice SearchIndexer runs constantly, thus sucking up more CPU.
Granted, the system is a few years old, but this is unacceptable. I will look for ways to tune or upgrade the system to see if I can relieve the 100% spiking.
Andrew Grant has an excellent post on optimizing Windows Media Center to improve performance. I will try his suggestions out tonight. A more technical article on the same subject is on APCmag.com.
UPDATE 8/16/2008
Today, I wasted about an hour tracking this high CPU problem down. I accidentally scheduled a recording and wondered why Media Center Receiver service was taking up so much CPU. This was because it was recording a show and I didn't know it! I went into my Recordings and deleted the scheduled recording.
Reference
Getting Started with Windows Media Center in Vista
Getting Started with HDTV in Media Center
Great intro to channel tweaking in Media Center
Tweaking Media Center's HDTV Lineup
Media Center Receiver Server Technical Discussion
'sodo
Vista 32-bit, First Impressions
Making Sense of Home Theatre PCs
Last night, I spent a few hours experimenting with Windows Media Center on Vista and the new TV Pack, with the goal of getting digital cable from Comcast integrated into Media Center. As suggested from the article linked above, I reinstalled Vista (painfully slow). I then installed the TV Pack and associated hotfixes. That day, I had bought a Vista View Saber DA-1N1-I tuner card. It is PCI, to fit in my older Dell 400SC. I let Vista select the driver from the internet and I saw that it found the latest driver.
Setup in WMC was straightforward, similar to Ben's experience. I connected the card's NTSC connection to my comcast line. After the requisite asking of where Ilived, downloading of my area's TV guide and inspecting my tuners' connection, WMC got me to the point where I could select my area's cable provider. Since I live in NY Metro, there were about ten choices. I selected Comcast in Jersey City. So sure enough, channels 1-99 on Comcast appeared.
I was happy to see I had basic analog connectivity, but wondered where the digital channels went. At the time, I didn't realize that this was regular analog cable from Comcast. I went through the discovery process again, and this time I selected Comcast Digital as my provider. Well, this didn't work, because the cable was plugged into the analog, NTSC connection. In my haste, I hadn't realized that the card I bought is only good for ATSC, over the air HD and NTSC analog cable. It won't get me what I wanted, which was the ability to watch and record unencrypted, clear QAM channels via my Comcast connection. Duh.
Taking my idiocy in stride, I moved on to the ATSC output. When I connected my cable connection to ATSC, as expected, WMC didn't find any channels. I thought I might be able to use the cable coming from the back of the PC as an antenna, so I disconnected the opposite end of the cable from the PC (the splitter end), reran the automatic setup and I was nicely surprised to see that the WMC picked up the local over the air HD channel selection, about 14 channels in my case, directly across the river from Manhattan. Performance was a bit choppy, as my signal wasn't very good in my computer closet. I'm sure with a proper antenna, the signal would be great.
In both cases, analog cable and over the air, WMC picked the correct guide. The guide picked up all the shows, was really nice to navigate through and had lots of supplemental information. Very slick.
Today, I went back to the drawing board and picked up a Hauppauge WinTV HVR-1600 . I'll let you know how this install goes tomorrow.
Long story short, though, if you are looking for a card that works for NTSC and ATSC over the air signals out of the box with this latest update for WMC, the Vista View Saber seems to fit the bill.
UPDATE 8/14/2008
Last Tuesday, VistaView released a QAM patch (a simple registry tweak) for MediaCenter with TVpack to allow the Saber DA-1N1-I to allow you to tune QAM channels on ATSC cable TV: http://www.vistaview.tv/index.php?option=com_docman&task=cat_view&gid=31&Itemid=46
I downloaded the patch and rebooted. I split my cable line to go to both the analog NTSC and digital ATSC jacks on the back of the Vista View card. The positive: during the tuner setup, Media Center now sees both the analog tuner and a new digital cable tuner:
ViXS PureTV Analog TV Tuner
ViXS PureTV ATDC/DVBC Tuner
Continuing through the tuner setup, I can select my provider's (Comcast) channel selection and guide. Checking the source of the channels under Guide -> Edit Channels, I get a mix of the OTA HD channels (about 14 channels) on the Digital Cable connection, but the rest (70 or so) are coming through the analog tuner. The digital channels seem to break up a lot. I imagine using an HD antenna instead of the digital cable would help here, since the digital cable is only getting me those 14 channels. If I hook up only one cable to the ATSC input, I only get those 14 channels. I have had no luck seeing any channels I would normally see with the Comcast Motorola box above 99.
From the Guide -> Edit channels, I see that most of the available channels that are disabled have padlocks next to them and that the source of them is the digital tuner. I imagine the padlocks mean that they are encrypted.
Tonight allowed me to get a bit farther, but am perplexed as to why I'm not seeing any channels above 99. I am a bit of a newbie to this MediaCenter/cable integration stuff. It seems as if Comcast locks everything above 99..not sure right now. Looking at the clear qam guide for my zip code here https://www.silicondust.com/hdhomerun/lineupui?Cmd=LocationProgramsWeb&Country=US&Postcode=07302, I notice that the higher range (above 99) channels that I enjoy watching like Military/VH1 classic/Encore/etc are missing from the list. I guess they are not in clear QAM. Maybe I'm just out of luck?
So, a bit of progress, a bit of disappointment.
UPDATE 8/15/2008
One follow up: I'm a bit disappointed in the performance of HDTV in Media Center w/TV Pack. I've got a Dell SC400 (probably four 1/2 years old) P4, 3.2Ghz, 2GB w/120GB IDE drive and ATI all-in-wonder 9800 pro. Not the latest and greatest, sure, but no slouch box either. Viewing standard def, Media Center drives the box to run at 50% CPU without a problem. Running live HDTV (1280x720), MC runs the box to 100%, at which point I get drop outs. Also, I notice SearchIndexer runs constantly, thus sucking up more CPU.
Granted, the system is a few years old, but this is unacceptable. I will look for ways to tune or upgrade the system to see if I can relieve the 100% spiking.
Andrew Grant has an excellent post on optimizing Windows Media Center to improve performance. I will try his suggestions out tonight. A more technical article on the same subject is on APCmag.com.
UPDATE 8/16/2008
Today, I wasted about an hour tracking this high CPU problem down. I accidentally scheduled a recording and wondered why Media Center Receiver service was taking up so much CPU. This was because it was recording a show and I didn't know it! I went into my Recordings and deleted the scheduled recording.
Reference
Getting Started with Windows Media Center in Vista
Getting Started with HDTV in Media Center
Great intro to channel tweaking in Media Center
Tweaking Media Center's HDTV Lineup
Media Center Receiver Server Technical Discussion
'sodo
Saturday, August 09, 2008
Vista Ultimate 32-bit first impressions
This is a follow up to my first post
Making Sense of Home Theatre PCs
Last night, I experimented with Vista Ultimate, 32-bit for the first time. My intention was to use Windows Media Center to access all my digital media and to feed Media Center my Comcast HDTV connection. As I was going to install Vista on a 1.8Ghz Pentium IV with 1.5GB of memory, I knew the system was underpowered for Vista and that the install didn't have much of a chance of running smoothly.
I was correct for a number of reasons:
1) First, the Vista install did not recognized my Sil0680 IDE RAID card.
This was a bummer, as I thought I could make up for the lack of CPU horsepower by running a stripe set. During the install, Vista is smart enough to allow you to stop and look for drivers. It also allows you to search for drivers on a USB flash drive, so I found Sil 680 drivers from here:
http://www.driversdown.com/drivers/Silicon-Image-SIL-0680-0680A-IDE-RAID-Driver_75442.shtml
and then copied them to the USB. However, when I loaded them on the box, Vista did not recognize the drivers as the correct drivers for the Sil RAID card. This is doubly disappointing as the Ultimate install DVD I had was SP1. Argh.
So, I had to back off and install the base OS to a regular IDE drive that I had floating around. That was problematic too, as the primary partition was not marked as active. So, I had to boot up with a floppy, mark it as active and give it a base format. Surprisingly, Vista still did not recognize the partition as usable. So, just to see if an older XP install would recognize the partition, I booted with XP. Luckily, XP did see the partition. In fact, though fdisk reported only one partition on the drive, the XP install disk saw two partitions. Strange. Using the XP installer, I deleted both partitions, created a new one and reformatted as NTFS. This seemed to do the trick and the XP install continued and installed XP.
After the XP install finished correctly, I reinserted the Vista install DVD and gave the install another shot. Because I had fixed the drive partition problems with XP, Vista now saw the partition correctly and I was able to install the OS successfully.
2) The install process took interminably long and did not give you adequate feedback about where it was in the process and when that part of the process was going to be finished.
3) ATI's All-in-Wonder Radeon 8500DV does not work with Vista.
This was also a great bummer, as I wanted to try out some of the TV functionality with Windows Media Center. Reading the install README from the Catalyst download section on ATIs website:
http://ati.amd.com/support/drivers/vista32/common-vista32.html
it seems that older card is not supported under Vista. I was hoping to take advantage of my older equipment. With Vista, again, this was not to be.
4) Vista is a resource hog.
Once I got Vista running, the OS did seem to run fairly smoothly on this low-end equipment. However, Vista is heavy:
- base install requires about 10GB with the default install selections
- memory usage is about 540MB with nothing running
Conclusions
So, Vista is a hog. And it is designed for the latest and greatest equipment. I would not recommend the operating system for users who want to take advantage of older equipment they have lying around. Vista just won't run it. This might be Microsoft's way of weaning old equipment off the supported hardware list. Which is here if you need it:
Vista Hardware Compatibility List
As I experiment more with Vista, I will let you know my impressions of the OS. Right now, I'm a bit saddened that Microsoft has kicked the old folks (READ: old equipment) out the door in favor for the new.
Aren't we supposed to care for our elders?
Cacasodo
Making Sense of Home Theatre PCs
Last night, I experimented with Vista Ultimate, 32-bit for the first time. My intention was to use Windows Media Center to access all my digital media and to feed Media Center my Comcast HDTV connection. As I was going to install Vista on a 1.8Ghz Pentium IV with 1.5GB of memory, I knew the system was underpowered for Vista and that the install didn't have much of a chance of running smoothly.
I was correct for a number of reasons:
1) First, the Vista install did not recognized my Sil0680 IDE RAID card.
This was a bummer, as I thought I could make up for the lack of CPU horsepower by running a stripe set. During the install, Vista is smart enough to allow you to stop and look for drivers. It also allows you to search for drivers on a USB flash drive, so I found Sil 680 drivers from here:
http://www.driversdown.com/drivers/Silicon-Image-SIL-0680-0680A-IDE-RAID-Driver_75442.shtml
and then copied them to the USB. However, when I loaded them on the box, Vista did not recognize the drivers as the correct drivers for the Sil RAID card. This is doubly disappointing as the Ultimate install DVD I had was SP1. Argh.
So, I had to back off and install the base OS to a regular IDE drive that I had floating around. That was problematic too, as the primary partition was not marked as active. So, I had to boot up with a floppy, mark it as active and give it a base format. Surprisingly, Vista still did not recognize the partition as usable. So, just to see if an older XP install would recognize the partition, I booted with XP. Luckily, XP did see the partition. In fact, though fdisk reported only one partition on the drive, the XP install disk saw two partitions. Strange. Using the XP installer, I deleted both partitions, created a new one and reformatted as NTFS. This seemed to do the trick and the XP install continued and installed XP.
After the XP install finished correctly, I reinserted the Vista install DVD and gave the install another shot. Because I had fixed the drive partition problems with XP, Vista now saw the partition correctly and I was able to install the OS successfully.
2) The install process took interminably long and did not give you adequate feedback about where it was in the process and when that part of the process was going to be finished.
3) ATI's All-in-Wonder Radeon 8500DV does not work with Vista.
This was also a great bummer, as I wanted to try out some of the TV functionality with Windows Media Center. Reading the install README from the Catalyst download section on ATIs website:
http://ati.amd.com/support/drivers/vista32/common-vista32.html
it seems that older card is not supported under Vista. I was hoping to take advantage of my older equipment. With Vista, again, this was not to be.
4) Vista is a resource hog.
Once I got Vista running, the OS did seem to run fairly smoothly on this low-end equipment. However, Vista is heavy:
- base install requires about 10GB with the default install selections
- memory usage is about 540MB with nothing running
Conclusions
So, Vista is a hog. And it is designed for the latest and greatest equipment. I would not recommend the operating system for users who want to take advantage of older equipment they have lying around. Vista just won't run it. This might be Microsoft's way of weaning old equipment off the supported hardware list. Which is here if you need it:
Vista Hardware Compatibility List
As I experiment more with Vista, I will let you know my impressions of the OS. Right now, I'm a bit saddened that Microsoft has kicked the old folks (READ: old equipment) out the door in favor for the new.
Aren't we supposed to care for our elders?
Cacasodo
Subscribe to:
Posts (Atom)