Monday, December 26, 2022

beefing up my Pop-OS's resiliency

After a mishap with some Steam drivers that caused me to reinstall Pop-OS, I decided to make my box a bit more resilient. I noticed that my Pop-OS install didn't have a recovery drive. This is a very nice feature if you don't want to go hunting for a USB if your root filesystem ever got corrupted.

Normally you get the Recovery partition out of the box with Pop-OS. But I had done a custom install. You don't get a Recovery partition if you don't specifically add it. So I had to jump through a few hoops listed in this article here. But that article needed a decent example of a two things:

  • running the pop-os upgrade tool 
  • mapping the correct UUIDs in the recovery.conf and boot loader entry 

Here are the mappings, shown here with colors to help identify what goes where: 


Here is the upgrade command:

pop-upgrade recovery upgrade from-release 22.04
 
Took about a minute to refresh the /recovery filesystem.  Here is the output from the journal. You can see this interactively if you open a terminal with the command "journalctl -flu pop-upgrade":
 
sodo@pop-os:~$ journalctl -b0 | grep pop-upgrade
Dec 25 12:03:52 pop-os com.system76.PopUpgrade.Notify.desktop[3621]: checking if pop-upgrade requires an update
Dec 25 12:03:52 pop-os pop-upgrade[3762]: [INFO ] daemon/mod.rs:389: initializing daemon
Dec 25 12:03:52 pop-os pop-upgrade[3762]: [INFO ] daemon/mod.rs:749: daemon registered -- listening for new events
Dec 25 12:03:52 pop-os pop-upgrade[3794]: pop-upgrade was already not on hold.
Dec 25 12:03:52 pop-os pop-upgrade[3762]: [INFO ] daemon/mod.rs:1099: updating apt sources
Dec 25 12:03:52 pop-os pop-upgrade[3856]: Hit:1 https://dl.google.com/linux/chrome/deb stable InRelease
Dec 25 12:03:52 pop-os pop-upgrade[3856]: Hit:2 http://apt.pop-os.org/proprietary jammy InRelease
Dec 25 12:03:52 pop-os pop-upgrade[3856]: Hit:3 http://apt.pop-os.org/release jammy InRelease
Dec 25 12:03:52 pop-os pop-upgrade[3856]: Hit:4 http://apt.pop-os.org/ubuntu jammy InRelease
Dec 25 12:03:52 pop-os pop-upgrade[3856]: Hit:5 http://apt.pop-os.org/ubuntu jammy-security InRelease
Dec 25 12:03:52 pop-os pop-upgrade[3856]: Hit:6 http://apt.pop-os.org/ubuntu jammy-updates InRelease
Dec 25 12:03:52 pop-os pop-upgrade[3856]: Hit:7 http://apt.pop-os.org/ubuntu jammy-backports InRelease
Dec 25 12:03:53 pop-os pop-upgrade[3856]: Reading package lists...
Dec 25 12:03:53 pop-os pop-upgrade[3762]: [INFO ] daemon/mod.rs:1010: performing a release check
Dec 25 12:03:53 pop-os pop-upgrade[3762]: [INFO ] daemon/mod.rs:1017: Release { current: "22.04", lts: "true",  next: "22.10", available: false }
Dec 25 12:03:53 pop-os pop-upgrade[3762]: [INFO ] release_api.rs:58: checking for build 22.04 in channel nvidia
Dec 25 12:03:54 pop-os systemd[1]: pop-upgrade.service: Deactivated successfully.
Dec 25 12:03:54 pop-os systemd[1]: pop-upgrade.service: Consumed 1.066s CPU time.
Dec 25 12:04:03 pop-os systemd[1225]: pop-upgrade-notify.service: Control process exited, code=killed, status=15/TERM
Dec 25 12:04:03 pop-os systemd[1225]: pop-upgrade-notify.service: Failed with result 'signal'.
Dec 25 12:04:48 pop-os pop-upgrade[5183]: checking if pop-upgrade requires an update
Dec 25 12:04:48 pop-os pop-upgrade[5200]: [INFO ] daemon/mod.rs:389: initializing daemon
Dec 25 12:04:48 pop-os pop-upgrade[5200]: [INFO ] daemon/mod.rs:749: daemon registered -- listening for new events
Dec 25 12:04:48 pop-os pop-upgrade[5218]: pop-upgrade was already not on hold.
Dec 25 12:04:48 pop-os pop-upgrade[5200]: [INFO ] daemon/mod.rs:1099: updating apt sources
Dec 25 12:04:49 pop-os pop-upgrade[5221]: Hit:1 https://dl.google.com/linux/chrome/deb stable InRelease
Dec 25 12:04:49 pop-os pop-upgrade[5221]: Hit:2 http://apt.pop-os.org/proprietary jammy InRelease
Dec 25 12:04:49 pop-os pop-upgrade[5221]: Hit:3 http://apt.pop-os.org/release jammy InRelease
Dec 25 12:04:49 pop-os pop-upgrade[5221]: Hit:4 http://apt.pop-os.org/ubuntu jammy InRelease
Dec 25 12:04:49 pop-os pop-upgrade[5221]: Hit:5 http://apt.pop-os.org/ubuntu jammy-security InRelease
Dec 25 12:04:49 pop-os pop-upgrade[5221]: Hit:6 http://apt.pop-os.org/ubuntu jammy-updates InRelease
Dec 25 12:04:49 pop-os pop-upgrade[5221]: Hit:7 http://apt.pop-os.org/ubuntu jammy-backports InRelease
Dec 25 12:04:50 pop-os pop-upgrade[5221]: Reading package lists...
Dec 25 12:04:50 pop-os pop-upgrade[5200]: [INFO ] daemon/mod.rs:1010: performing a release check
Dec 25 12:04:50 pop-os pop-upgrade[5200]: [INFO ] daemon/mod.rs:1017: Release { current: "22.04", lts: "true",  next: "22.10", available: false }
Dec 25 12:04:50 pop-os pop-upgrade[5200]: [INFO ] release_api.rs:58: checking for build 22.04 in channel nvidia
Dec 25 12:04:50 pop-os systemd[1]: pop-upgrade.service: Deactivated successfully.
Dec 25 12:04:50 pop-os systemd[1]: pop-upgrade.service: Consumed 1.000s CPU time.
 
Just wanted to highlight those two things.  Best of luck if you try creating the Recovery partition.  It was a bit of a challenge!
 
Just remember: DON'T PUT YOUR RECOVERY PARTITION ON A FILESYSTEM ALONGSIDE ANY OF THE OTHERS YOU EXPECT TO WIPE CLEAN!!  What happened to me was that I initially put the recovery partition on a RAID 0 set, /dev/md0 as the third partition (/dev/md0p3).  The problem was, when I went to recover, because that third partition was along side my /root partition (/dev/md0p2), the installer couldn't lock the entire filesystem, as /dev/md0p3 was in use.  So I couldn't see the /dev/md0 raid set at all in the installer.  I could only see the underlying physical partitions (not the mdadm RAID partitions).   This happened to be installed on NVMe drives, so all I saw was "/dev/nvme2n1p2" and NOT /dev/md0.  So beware!  To resolve, I just put the recovery drive on a second hard drive that I use for my backup.  This drive is not / (root), /boot, /boot/efi or swap.  It's just a Seagate Ironwolf disk that I occasionally mount to do backups (/dev/sda).
 
Oh and I also made a RAID5 set on a second PC and added an rsync to the cron for that guy.  This is in case my main box gets blown up for whatever reason:
rsync -avxHAXP --info=progress2 --exclude='Downloads' --delete /mnt/sodofiles/* sodo@secondbox:/sodoFiles
 
Yay for resiliency! 

Next stop will be creating some Ansible scripts to configure a newly spun up box with all the core softwares that run my editing rig.

'sodo
 
References

 
R

Saturday, January 08, 2022

Asus Z590-E gaming motherboard, i7-11700K 11th gen (LGA1200) build

After a series of issues, I decided to build a new box.  This is my first build since 2013, so a lot of technology has changed.  Since the issues revolved around spinning disks, I thought I'd remove that problem entirely by buying only SSDs.  This turned out to be a fun build.


CATEGORY WHAT URL UNIT COST UNITS TOTAL COST
CPU Intel Core i7-11700K Desktop Processor 8 Cores up to 5.0 GHz Unlocked LGA1200 https://www.amazon.com/Intel-i7-11700K-Desktop-Processor-Unlocked/dp/B08X6ND3WP?th=1 $354.00 1 $354.00
MOTHERBOARD Asus Z590-E Gaming WiFi 6E LGA 1200(Intel 11th/10th Gen) ATX Gaming Motherboard https://www.amazon.com/ROG-Gaming-Motherboard-Stages-Thunderbolt/dp/B08T6HTXF9 $359.99 1 $359.99
MEMORY Corsair Vengeance RGB Pro 32GB (2x16GB) DDR4 3600 (PC4-28800) C18 https://www.amazon.com/Corsair-Vengeance-2x16GB-PC4-28800-Optimized/dp/B082DGZJ9C/ref=sr_1_2?crid=SYEGHUBHE26B $152.99 1 $152.99
DISK1 PNY XLR8 CS3040 4TB M.2 NVMe Gen4 x4 Internal Solid State Drive (SSD) https://www.amazon.com/PNY-CS3040-Internal-Solid-State-Drive-M280CS3040-4TB-RB/dp/B08TRN15K5/ref=sr_1_1?crid=58NNUWQ2KRY3&th=1 $549.99 2 $1,099.98
DISK2 SAMSUNG 970 EVO Plus SSD 500GB - M.2 NVMe Interface Internal Solid State Drive https://www.amazon.com/Samsung-970-EVO-Plus-MZ-V7S500B/dp/B07M7Q21N7/ref=sr_1_1?crid=1Q9C4DFCS8DEL&th=1 $69.99 2 $139.98
VIDEO CARD NVIDIA - GeForce GTX 970 4GB GDDR5 PCI Express 3.0 Graphics Card https://www.amazon.com/NVIDIA-GeForce-GDDR5-Express-Graphics/dp/B00UNF2XRK/ref=sr_1_2?crid=1JSKD3XD3JBZR $364.92 1 $364.92
FAN Corsair iCUE H100i Elite Capellix Liquid CPU Cooler https://www.amazon.com/Corsair-H100i-Capellix-Liquid-Cooler/dp/B08G1NSG7F/ref=sr_1_3?crid=3NAH6JA9UOFH5&th=1 $149.99 1 $149.99
POWER SUPPLY Corsair RM Series, RM750, 750 Watt, 80+ Gold Certified, Fully Modular Power Supply https://www.amazon.com/CORSAIR-Certified-Modular-Microsoft-Standby/dp/B07RF237B1/ref=sr_1_3?crid=RPYYLTL70BIN&th=1 $82.21 1 $82.21
CASE NZXT H510i - CA-H510i-W1 - Compact ATX Mid -Tower PC Gaming Case https://www.amazon.com/NZXT-H510i-Vertical-Integrated-Water-Cooling/dp/B07TD9S3HZ/ref=sr_1_2?crid=3TBS1R50XAAH&th=1 $134.99 1 $134.99


TOTAL $2,839.05

OS Specs

  • POP-OS Linux
  • RAID0 of system drive
  • RAID1 for data drive


Things learned along the way:

  • UEFI through and through for future proofing
  • Needed to manually enable M.2-4 slot in BIOS
  • Great article on formatting RAID set for Linux: https://forum.level1techs.com/t/guide-install-pop-os-20-04-on-raid/156379
  • Rsync is your friend: rsync -avxHAX --progress /myFiles/* /backup/
  • NVMe drives can load so fast that mdadm doesn't have time to settle down.  Have to add x-systemd.device-timeout=0 parameter to /etc/fstab
  • RGB Lights are pretty


That's it for now.  Cheers!

TAG 


Saturday, January 01, 2022

RAID problem leading up to new build

It has been a looong time since I posted.  Hello again.  This post begins with a simple desire to replace a member of an Intel RST (Rapid Storage Technology) RAID set..(after upgrading to latest Fedora and encountering Grub issues with load..but that is another story).


You may remember my original build from 2013 here: http://www.techanswerguy.com/2013/04/i7-3930k-lga2011-build-asus-p9x79.html

This is the box that my RAID-10 set is installed in.  As it's 8.5 years later, the 1.5TB Western Digital drives in that RAID are getting a bit long in the tooth.  Failing one was from 2009.  Replacement should be no biggie, but I had to buy a new one (2.0TB were the easiest to get) and refresh my knowledge of RAID.  And Intel RST, the firmware (IE, not hardware) RAID.  So before touching the box, I'd need to backup what I had just in case the new disk gave me problems or be in a real world of hurt with a dead RAID set.

Digging into dmesg, I saw a bunch of errors that I never got to resolving (EDAC sbridge: Failed to register device with error -19).  The real problem I needed to address were the smartctl errors I saw: unrecovered read error - auto reallocate failed - Google Search.   


I'd recommended everyone have smartctltools installed.  Very helpful, basic diagnostic utility:


As I was thinking about the problem, I figured to solve this issue going forward and let me just get a ton of storage.  So I searched for an bought 3 6TB Seagate IronWolf Pro recertified SATAs from ServerPartsDeals.  Good shop, got them for $124 each.

Now with future state in hand, I went back to work on the problem.  I thought it might be faster to copy to the backup directly over SATA instead of USB.  This was my downfall, as the Asus BIOS started flaking out.  The issue was that when I chose to do a simple thing, connect a new SATA disk, the BIOS would hang and not give me the ability to log into the BIOS.  After fussing with various settings for two days:


I thought best idea might be to update the BIOS.  Never got back to that.  But I had errors indicating the CMOS battery was dying.  So I went to store to get one.  That didn't fix my issue.

Getting completely frustrated, I abandoned the idea of copying the data off the RAID to an internal drive, reset the configuration back to the way it was and rebooted the box.  The BIOS still would hang occasionally..that was weird.  But I had to get the data off the RAID, so I hooked up my USB drive bucket with an older (circa 2012) 3TB backup drive, mounted the disk.  Using rsync, I was able to get the data off the RAID drive to the external:

 rsync -avxHAX --info=progress2 --exclude 'Downloads/'  /home/sodo/* /mnt/extbackup/

Phew.  That was close.  Now, with the backup created, I was able to safely undertake the procedure to replace the drive and rebuild the raid.  This was the easiest part of the whole shebang:
- poweroff and unplug
- remove drive
- install new 2.0TB

Once this was done, I started the box up and watched the RAID rebuild:


But the nagging BIOS issues on the box still irked me.  During troubleshooting, I manhandled the video card and pulled it out while the PCIe card was locked.  I pulled some of the pins from the mobo.  Bad, bad, bad.  So I decided that the box may have had it's day and I researched my options.  Time to upgrade!!  I was off to build a new box based upon Intel's 11th gen chip, the i7-11700K.  Affordable and not too crazy.  And I chose a new mobo, too.  The Asus Z590-E. This should be fun!

Until next time..happy new year and happy computing!

TAG

Wednesday, May 25, 2016

With BIOS update, Intel RAID gives "Non-Member Disk" error on RAID1+0 set

In prep to play the new DOOM 4 by installing a Windows SSD in my video editing machine, I ran a BIOS update on my Asus P9X79.  After the update, the Intel onboard C600 chipset RAID controller dropped two of the four RAID1+0 members that I had created from RAID members to "Non-Member" disks.  After researching the problem, it seemed that many people have had the issue with the Intel RAID:
 
Apparently, Intel RAID gets upset when the BIOS gets updated.  At a high level, what you do to resolve is 
A. Turn all members into Non-Raid Members
B. Re-create the RAID in the exact same order that it was created
- Don't Delete the RAID set, as that has caused data loss for some people
C. Usually, the partition table gets blown away when you recreate the RAID.  You then have to go find it again by running a program like TestDisk to find and rewrite any missing partitions
------------------
The Path I Took
Of course, when I ran TestDisk, I compounded the problem by choosing the wrong partition.  I basically got confused, as TestDisk allows you to select from a couple of choices:
1) Intel/PC partition
2) EFI GPT partition map
 
Now, my BIOS is UEFI and the drives all had GPT partition maps.  I thought that was the logical choice and I selected it.  It showed me two main drives:
- MS Data partition, size 200MB
- MS Data partition, size 2.7TB, the size of my RAID set
 
First, I wrote the 200MB partition table having the 200MB filesystem.  This was the wrong thing to do.  I got confused because my drives were GPT and because most of the people on the threads I had been reading were Windows.  It was only after spending Saturday and Sunday reading that I found a couple (out of the hundreds) of posts on people with Linux OSs that actually had the correct instructions to fix my issue.  
 
For my Linux Fedora 22 system, I actually needed to select "1) Intel/PC partition".  Before I did this, I decided to:
1) Pull off any data that I could using PhotoRec, a program that reads files block-by-block, written by the same guy who wrote TestDisk, Christophe Grenier.  I wrote that data to my 3GB SATA.  This took about ten hours.
- I ran through this exercise, but of course, the files that PhotoRec outputs are labeled F000001.txt, F000002.sh, F000003.gz and so on.  The names and directory structures are totally lost.  The content of the data files, however, is kept and I was able to find the video editing scripts that I had spent 100s of hours developing.  That was good, but it would be an enormous pain-in-the-A to dig through them and rename them all.
 
2) After pulling off the data, I was going to blow away the 200MB MS Partition, as creating this was a mistake.  I did this with some trepidation, obviously, as I didn't want to do any more harm.
 
Once those two things were done, I went back into TestDisk and selected "Intel/PC partition."  This time, I saw a Linux partition of the correct size, 2.7TB.  TestDisk gives you the option of viewing the directory structure.  When I did this I got a foreboding message:
“Can’t open filesystem. Filesystem seems damaged.”
 
Ugh.  I pressed on and wrote the partition table to disk.  Mounting the filesystem, I got a new error:
mount: wrong fs type, bad option, bad superblock on /dev/md126p1
 
Ugh.  Doing some research, I found this article on fixing bad superblocks, which entails finding a good one from the many that are sprinkled throughout an ext4 filesystem:
 
I found the backup superblocks by using mke2fs:
sudo mke2fs -n /dev/md126p1
 
mke2fs showed me a number of superblocks available.  I prayed they were corrupt.  Using e2fsck, I chose one of the superblocks, 32768, from the output of mke2fs: 
sudo e2fsck -f -b 32768 /dev/md126p1
 
When the program ran, it found a few errors.  In case there were many errors, I CTRL-C'd out of e2fsck and restarted the program by adding the "-y" switch to let it run unattended and accept all fixes with a "yes."  I let it run.  After I came back to the terminal, I found the screen full of the text output of the program, with thousands of sector id codes scrolling by.  I wasn't sure if this was bad or good..but I let it finish.  Afterward, I mounted the drive.  
 
The mount came back without error.  Good.  The moment of truth was when I ran an "ls" and saw my files and directories!  However, I wasn't out of the woods yet.  The proof would be if I was able to access them.  I played some music files, opened a few videos, started up a VM..they all worked!  YAHOO!!  I didn't lose my stuff!!  Even though I have pretty much everything backed up, I did not have my scripts backed up and I've spent 100s of hours on those.  Thank God I got them back!!
 
So..hooray for me!
:)
Now onto playing DOOM, the reason why I got into that mess in the first place!!

Reference

Saturday, February 14, 2015

Fedora 18 to Fedora 21 upgrade using FedUp

Moved from Fedora 18 to 21.  I gotta say..pretty smooth.

Read up here:
https://fedoraproject.org/wiki/FedUp#How_Can_I_Upgrade_My_System_with_FedUp.3F
and read up on Common Bugs, as I hit the "Downloading failed: Didn't install any keysbug
http://fedoraproject.org/wiki/Common_F21_bugs

Oops, broken dependencies during FedUp, disabling RPM Fusion repos..

[sodo@monstrous 2014]$ sudo fedup --disablerepo rpmfusion-free --disablerepo rpmfusion-nonfree --disablerepo rpmfusion-nonfree-updates  --disablerepo rpmfusion-nonfree-updates-testing  --disablerepo rpmfusion-free-updates  --disablerepo rpmfusion-free-updates-testing --network 21
setting up repos...
getting boot images...
.treeinfo.signed                                                                                                                                             | 2.1 kB  00:00:00     
setting up update...
finding updates 100% [=============================================================================================================================================================]
WARNING: potential problems with upgrade
  audacious-plugins-freeworld-mms-3.3.4-1.fc18.x86_64 (no replacement) requires audacious-libs-3.3.4-2.fc18.x86_64 (replaced by audacious-libs-3.5.2-1.fc21.x86_64)
  gstreamer1-plugins-ugly-1.0.10-1.fc18.x86_64 (no replacement) requires libcdio-0.83-5.fc18.x86_64 (replaced by libcdio-0.92-3.fc21.x86_64)
  OpenEXR_Viewers-nonfree-1.0.2-10.fc18.x86_64 (no replacement) requires OpenEXR-libs-1.7.1-1.fc18.x86_64 (replaced by OpenEXR-libs-2.1.0-5.fc21.x86_64)
  OpenEXR_Viewers-nonfree-1.0.2-10.fc18.x86_64 (no replacement) requires ilmbase-1.0.3-4.fc18.x86_64 (replaced by ilmbase-2.1.0-3.fc21.x86_64)
  gstreamer-plugins-ugly-0.10.19-5.fc18.x86_64 (no replacement) requires libcdio-0.83-5.fc18.x86_64 (replaced by libcdio-0.92-3.fc21.x86_64)
  librtmp-2.4-0.2.20110811gitc58cfb3e.fc17.x86_64 (no replacement) requires gnutls-2.12.23-2.fc18.x86_64 (replaced by gnutls-3.3.12-1.fc21.x86_64)
  audacious-plugins-freeworld-ffaudio-3.3.4-1.fc18.x86_64 (no replacement) requires audacious-libs-3.3.4-2.fc18.x86_64 (replaced by audacious-libs-3.5.2-1.fc21.x86_64)
  vlc-core-2.0.9-1.fc18.x86_64 (no replacement) requires libgcrypt-1.5.3-1.fc18.x86_64 (replaced by libgcrypt-1.6.1-7.fc21.x86_64)
  librtmp-2.4-0.2.20110811gitc58cfb3e.fc17.x86_64 (no replacement) requires libgcrypt-1.5.3-1.fc18.x86_64 (replaced by libgcrypt-1.6.1-7.fc21.x86_64)
  mplayer-1.1-4.20121008svn.fc18.x86_64 (no replacement) requires libass-0.10.1-2.fc18.x86_64 (replaced by libass-0.12.0-1.fc21.x86_64)
  vlc-core-2.0.9-1.fc18.x86_64 (no replacement) requires libmatroska-1.3.0-3.fc18.x86_64 (replaced by libmatroska-1.4.2-1.fc21.x86_64)
  vlc-core-2.0.9-1.fc18.x86_64 (no replacement) requires gnutls-2.12.23-2.fc18.x86_64 (replaced by gnutls-3.3.12-1.fc21.x86_64)
  vcdimager-0.7.24-5.fc18.x86_64 (no replacement) requires libcdio-0.83-5.fc18.x86_64 (replaced by libcdio-0.92-3.fc21.x86_64)
  audacious-plugins-freeworld-aac-3.3.4-1.fc18.x86_64 (no replacement) requires audacious-libs-3.3.4-2.fc18.x86_64 (replaced by audacious-libs-3.5.2-1.fc21.x86_64)
  mjpegtools-gui-2.0.0-5.fc18.x86_64 (no replacement) requires SDL_gfx-2.0.22-3.fc18.x86_64 (replaced by SDL_gfx-2.0.25-2.fc21.x86_64)
  vcdimager-libs-0.7.24-5.fc18.x86_64 (no replacement) requires libcdio-0.83-5.fc18.x86_64 (replaced by libcdio-0.92-3.fc21.x86_64)
  vlc-core-2.0.9-1.fc18.x86_64 (no replacement) requires libebml-1.2.2-3.fc18.x86_64 (replaced by libebml-1.3.1-1.fc21.x86_64)
  mencoder-1.1-4.20121008svn.fc18.x86_64 (no replacement) requires libcdio-0.83-5.fc18.x86_64 (replaced by libcdio-0.92-3.fc21.x86_64)
  ffmpeg-libs-1.0.8-1.fc18_fozz.x86_64 (no replacement) requires gnutls-2.12.23-2.fc18.x86_64 (replaced by gnutls-3.3.12-1.fc21.x86_64)
  ffmpeg-libs-1.0.8-1.fc18_fozz.x86_64 (no replacement) requires libass-0.10.1-2.fc18.x86_64 (replaced by libass-0.12.0-1.fc21.x86_64)
  normalize-0.7.7-6.fc17.x86_64 (no replacement) requires 1:audiofile-0.2.7-4.fc18.x86_64 (replaced by 1:audiofile-0.3.6-4.fc21.x86_64)
  avidemux-libs-2.6.4-5.fc18.x86_64 (no replacement) requires libass-0.10.1-2.fc18.x86_64 (replaced by libass-0.12.0-1.fc21.x86_64)
  vlc-core-2.0.9-1.fc18.x86_64 (no replacement) requires libass-0.10.1-2.fc18.x86_64 (replaced by libass-0.12.0-1.fc21.x86_64)
  audacious-plugins-freeworld-mp3-3.3.4-1.fc18.x86_64 (no replacement) requires audacious-libs-3.3.4-2.fc18.x86_64 (replaced by audacious-libs-3.5.2-1.fc21.x86_64)
  mplayer-1.1-4.20121008svn.fc18.x86_64 (no replacement) requires libcdio-0.83-5.fc18.x86_64 (replaced by libcdio-0.92-3.fc21.x86_64)
  ffmpeg-libs-1.0.8-1.fc18_fozz.x86_64 (no replacement) requires libgcrypt-1.5.3-1.fc18.x86_64 (replaced by libgcrypt-1.6.1-7.fc21.x86_64)
  mencoder-1.1-4.20121008svn.fc18.x86_64 (no replacement) requires libass-0.10.1-2.fc18.x86_64 (replaced by libass-0.12.0-1.fc21.x86_64)
  gstreamer1-plugins-bad-freeworld-1.0.10-1.fc18.x86_64 (no replacement) requires gnutls-2.12.23-2.fc18.x86_64 (replaced by gnutls-3.3.12-1.fc21.x86_64)
verify local files 100% [==========================================================================================================================================================]
testing upgrade transaction
rpm transaction 100% [=============================================================================================================================================================]
rpm install 100% [=================================================================================================================================================================]
setting up system for upgrade
WARNING: problems were encountered during transaction test:
  broken dependencies
    librtmp-2.4-0.2.20110811gitc58cfb3e.fc17.x86_64 requires libgcrypt-1.5.3-1.fc18.x86_64, gnutls-2.12.23-2.fc18.x86_64
    vlc-core-2.0.9-1.fc18.x86_64 requires libass-0.10.1-2.fc18.x86_64, libgcrypt-1.5.3-1.fc18.x86_64, libebml-1.2.2-3.fc18.x86_64, gnutls-2.12.23-2.fc18.x86_64, libmatroska-1.3.0-3.fc18.x86_64
    audacious-plugins-freeworld-ffaudio-3.3.4-1.fc18.x86_64 requires audacious-libs-3.3.4-2.fc18.x86_64
    vcdimager-0.7.24-5.fc18.x86_64 requires libcdio-0.83-5.fc18.x86_64
    audacious-plugins-freeworld-aac-3.3.4-1.fc18.x86_64 requires audacious-libs-3.3.4-2.fc18.x86_64
    gstreamer-plugins-ugly-0.10.19-5.fc18.x86_64 requires libcdio-0.83-5.fc18.x86_64
    normalize-0.7.7-6.fc17.x86_64 requires audiofile-1:0.2.7-4.fc18.x86_64
    ffmpeg-libs-1.0.8-1.fc18_fozz.x86_64 requires libass-0.10.1-2.fc18.x86_64, libgcrypt-1.5.3-1.fc18.x86_64, gnutls-2.12.23-2.fc18.x86_64
    mjpegtools-gui-2.0.0-5.fc18.x86_64 requires SDL_gfx-2.0.22-3.fc18.x86_64
    vcdimager-libs-0.7.24-5.fc18.x86_64 requires libcdio-0.83-5.fc18.x86_64
    OpenEXR_Viewers-nonfree-1.0.2-10.fc18.x86_64 requires OpenEXR-libs-1.7.1-1.fc18.x86_64, ilmbase-1.0.3-4.fc18.x86_64
    audacious-plugins-freeworld-mp3-3.3.4-1.fc18.x86_64 requires audacious-libs-3.3.4-2.fc18.x86_64
    audacious-plugins-freeworld-mms-3.3.4-1.fc18.x86_64 requires audacious-libs-3.3.4-2.fc18.x86_64
    gstreamer1-plugins-bad-freeworld-1.0.10-1.fc18.x86_64 requires gnutls-2.12.23-2.fc18.x86_64
    avidemux-libs-2.6.4-5.fc18.x86_64 requires libass-0.10.1-2.fc18.x86_64
    gstreamer1-plugins-ugly-1.0.10-1.fc18.x86_64 requires libcdio-0.83-5.fc18.x86_64
    mplayer-1.1-4.20121008svn.fc18.x86_64 requires libass-0.10.1-2.fc18.x86_64, libcdio-0.83-5.fc18.x86_64
    mencoder-1.1-4.20121008svn.fc18.x86_64 requires libass-0.10.1-2.fc18.x86_64, libcdio-0.83-5.fc18.x86_64
Continue with the upgrade at your own risk.


Full list of packages without updates:
Packages without updates:
  a52dec-0.7.4-16.fc17.x86_64
  a52dec-devel-0.7.4-16.fc17.x86_64
  adobe-release-x86_64-1.0-1.noarch
  aic94xx-firmware-30-4.fc18.noarch
  automake14-1.4p6-23.fc18.noarch
  automake17-1.7.9-17.fc18.noarch
  btparser-0.25-1.fc18.x86_64
  celt-0.11.1-4.fc18.x86_64
  celt-devel-0.11.1-4.fc18.x86_64
  easymock2-2.5.2-7.fc18.noarch
  faac-1.28-4.fc17.x86_64
  faac-devel-1.28-4.fc17.x86_64
  firstboot-18.7-1.fc18.x86_64
  freetype-freeworld-2.4.10-4.fc18.x86_64
  google-chrome-stable-40.0.2214.111-1.x86_64
  google-earth-stable-7.1.2.2041-0.x86_64
  google-talkplugin-5.40.2.0-1.x86_64
  gstreamer-ffmpeg-0.10.13-10.fc18.x86_64
  gstreamer1-libav-1.0.10-1.fc18.x86_64
  jre-1.7.0_40-fcs.x86_64
  kernel-3.11.10-100.fc18.x86_64
  kernel-3.11.7-100.fc18.x86_64
  kernel-devel-3.11.10-100.fc18.x86_64
  kernel-devel-3.11.7-100.fc18.x86_64
  kernel-modules-extra-3.11.10-100.fc18.x86_64
  kernel-modules-extra-3.11.7-100.fc18.x86_64
  lame-3.99.5-1.fc18.x86_64
  lame-devel-3.99.5-1.fc18.x86_64
  lame-libs-3.99.5-1.fc18.x86_64
  libCg-3.1.0013-2.fc18.x86_64
  libdca-0.0.5-6.fc17.x86_64
  libdvbpsi-0.2.2-2.fc17.x86_64
  libdvbpsi-devel-0.2.2-2.fc17.x86_64
  libgssglue-0.4-1.fc18.x86_64
  libmad-0.15.1b-15.fc18.x86_64
  libmimic-1.0.4-5.fc17.x86_64
  libmms-0.6.2-2.fc18.x86_64
  libmpeg2-0.5.1-9.fc17.x86_64
  libmpg123-1.14.4-1.fc18.x86_64
  live555-0-0.38.2012.10.18.fc18.x86_64
  mac-libs-3.99-9.u4b5.fc17.x86_64
  mjpegtools-devel-2.0.0-5.fc18.x86_64
  mjpegtools-libs-2.0.0-5.fc18.x86_64
  mplayer-common-1.1-4.20121008svn.fc18.x86_64
  msttcorefonts-2.5-1.noarch
  nvidia-settings-319.32-1.fc18.x86_64
  nvidia-xconfig-319.32-1.fc18.x86_64
  opencore-amr-0.1.3-2.fc18.x86_64
  rpmfusion-free-release-18-3.noarch
  rpmfusion-nonfree-release-18-3.noarch
  twolame-libs-0.3.13-2.fc17.x86_64
  uade-2.13-3.fc17.x86_64
  vo-amrwbenc-0.1.2-1.fc18.x86_64
  x264-devel-0.128-2.20121118gitf6a8615.fc18.x86_64
  x264-libs-0.128-2.20121118gitf6a8615.fc18.x86_64
  xfce4-websearch-plugin-0.1.1-0.18.20070428svn2704.fc18.x86_64
  xmms-mp3-1.2.11-4.20071117cvs.fc17.x86_64
  xmms-uade-2.13-3.fc17.x86_64
  xmms-xmp-3.5.0-3.fc18.x86_64
  xmmsctrl-1.8-9.fc18.x86_64
  xvidcore-1.3.2-3.fc17.x86_64
  xvidcore-devel-1.3.2-3.fc17.x86_64
  y4mscaler-9.0-11.fc17.x86_64
  1:anaconda-yum-plugins-1.0-8.fc18.noarch
  1:faad2-2.7-2.fc17.x86_64
  1:faad2-devel-2.7-2.fc17.x86_64
  1:faad2-libs-2.7-2.fc17.x86_64
  1:xmms-faad2-2.7-2.fc17.x86_64

Delete some problem children before starting upgrade..
[sodo@monstrous ~]$ cat zapDepsProblemsExe.sh 
sudo yum remove librtmp-2.4-0.2.20110811gitc58cfb3e.fc17.x86_64 \
vlc-core-2.0.9-1.fc18.x86_64 \
audacious-plugins-freeworld-ffaudio-3.3.4-1.fc18.x86_64 \
vcdimager-0.7.24-5.fc18.x86_64 \
audacious-plugins-freeworld-aac-3.3.4-1.fc18.x86_64 \
gstreamer-plugins-ugly-0.10.19-5.fc18.x86_64 \
normalize-0.7.7-6.fc17.x86_64 \
ffmpeg-libs-1.0.8-1.fc18_fozz.x86_64 \
mjpegtools-gui-2.0.0-5.fc18.x86_64 \
vcdimager-libs-0.7.24-5.fc18.x86_64 \
OpenEXR_Viewers-nonfree-1.0.2-10.fc18.x86_64 \
audacious-plugins-freeworld-mp3-3.3.4-1.fc18.x86_64 \
audacious-plugins-freeworld-mms-3.3.4-1.fc18.x86_64 \
gstreamer1-plugins-bad-freeworld-1.0.10-1.fc18.x86_64 \
avidemux-libs-2.6.4-5.fc18.x86_64 \
gstreamer1-plugins-ugly-1.0.10-1.fc18.x86_64 \
mplayer-1.1-4.20121008svn.fc18.x86_64 \
mencoder-1.1-4.20121008svn.fc18.x86_64 


Let's give it a shot
..
..
..upgrade worked!  Took about 1/2 hour

Had a strange problem with my keyboard only working from an older USB port.  Weird.

And I had to reinstall some apps.
[sodo@monstrous ~]$ cat restOfProgs.sh 
sudo yum install  a52dec \
  a52dec-devel \
  adobe-release-x86_64 \
  automake* \
  btparser \
  faac \
  faac-devel \
  firstboot \
  freetype-freeworld \
  google-earth-stable \
  google-talkplugin \
  gstreamer-ffmpeg \
  gstreamer1-libav \
  lame \
  lame-devel \
  lame-libs \
  libCg \
  libdca \
  libdvbpsi \
  libdvbpsi-devel \
  libgssglue \
  libmad \
  libmimic \
  libmms \
  libmpeg2 \
  libmpg123 \
  live555 \
  mac-libs \
  mjpegtools-devel \
  mjpegtools-libs \
  mplayer \
  mplayer-common \
  msttcorefonts \
  opencore-amr \
  twolame-libs \
  uade \
  vo-amrwbenc \
  x264-devel \
  x264-libs \
  xmms-mp3 \
  xmms-uade \
  xmms-xmp \
  xmmsctrl \
  xvidcore \
  xvidcore-devel \
  y4mscaler \
  faad2 \
  faad2-devel \
  faad2-libs \
  xmms-faad2 
[sodo@monstrous ~]$ cat ffmpegDeps.sh 
yum install libcdio-paranoia-devel \ 
ocl-icd-devel \
opencl-headers \ 
soxr-devel \
x265-devel


Now rebuild FFmpeg from my old instructions here:
http://crazedmuleproductions.blogspot.com/2010/02/fedora-12-x86-64-cinelerra-install.html

Worked, but a little libx264 version mismatch, so let's link the older static object to the new one..
[sodo@monstrous x86_64]$ ffmpeg -i Downloads/StormPigs20141227.mp4 test.wmv
ffmpeg: error while loading shared libraries: libx264.so.128: cannot open shared object file: No such file or directory
[sodo@monstrous x86_64]$ sudo ln -s /usr/lib64/libx264.so /usr/lib64/libx264.so.128
[sudo] password for sodo: 
[sodo@monstrous x86_64]$ ll /usr/lib64/libx264*
lrwxrwxrwx 1 root root      17 Dec 22 10:51 /usr/lib64/libx26410b.so -> libx26410b.so.142
-rw-r--r-- 1 root root  885768 Dec 22 10:51 /usr/lib64/libx26410b.so.142
lrwxrwxrwx 1 root root      14 Dec 22 10:51 /usr/lib64/libx264.so -> libx264.so.142
lrwxrwxrwx 1 root root      21 Feb 14 18:55 /usr/lib64/libx264.so.128 -> /usr/lib64/libx264.so
-rw-r--r-- 1 root root 1034936 Dec 22 10:51 /usr/lib64/libx264.so.142

All good.  FFmpeg works.

Update some progs dependent upon FFmpeg:
[sodo@monstrous ~]$ cat ffmpegDeps.sh 
yum install libcdio-paranoia-devel \ 
ocl-icd-devel \
opencl-headers \ 
soxr-devel \
x265-devel \
libquicktime \
mencoder \
mjpegtools-lav \
mplayer \
vlc \
vlc-core \
vlc-devel \
vlc-extras \
vlc-plugin-jack \
x264* 

We'll hafta see how it goes from here, but no odd audio problems, which I usually get and video plays fine.  Maybe Linux is grown up!

Other issues
After F21 upgrade, vmware 7.0 player borked: /lib64/libgcrypt.so.11: version `GCRYPT_1.2' not found. Older ver here: http://bit.ly/1Arz3Z5

Cinelerra 4.6 HV on Fedora21 immediately segfaults.Biggest thing: QA & lock down to test on 1 distro..clearly state what distro is supported..OpenGL the cause, move to X11-XV.

Fedora 21 upgrade broke Cinelerra Monty: vdevicebuz.C: error: ‘memcpy’ was not declared in this scope, fix here: http://bit.ly/1ECEtA8

Lost my FFmpeg presets: http://bit.ly/1yHRoMp

Chrome v 40.0.2214.111 tabs hang using Fedora 21. Delete .default/chrome helped, also tried downgraded to v39 seems to fix. Not first time I've had issues with Linux Chrome.


'sodo

Friday, April 12, 2013

i7 3930K (LGA2011) build: Asus P9X79

I spent a good few weeks researching and reading up on my latest monster video editing box.  Though it was expensive, I decided to go for the i7 3930K chip, a pricey $539 on sale from NewEgg.  Listed below are the parts that I assembled for the box.  The mainboard and the chipset were my primary concerns, but the other parts were chosen because they conformed to my build specs and they were on sale or discounted in one way or another during one of NewEgg's Build sales.

The cost of the items weren't bad, but they certainly added up:


1 x ($-75.00) DISCOUNT FOR AUTOADD #76165
$-75.00

1 x ($-85.80) DISCOUNT FOR PROMOTION CODE
$-85.80

Subtotal:$1707.10
Tax:$120.06
Shipping and Handling:$7.99
Total Amount:$1835.15


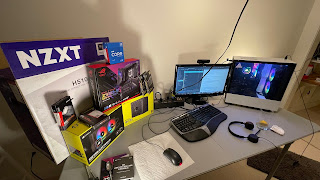
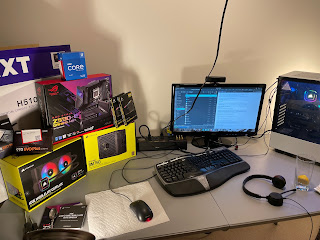
Here's a pic of them fresh out of the shipping box:
Because I don't build too often, it took about a day to assemble the main board and the components in the above picture.  It took another 1/2 day to port my four drive RAID 1+0 set from my old video editing workstation to this one.  Of course, I had to create a new RAID set on the new box.  I will no longer be using the trusty 3Ware 9650SE RAID card, as the new mobo has both Intel and Marvell RAID chipsets on board.  The Marvell only supports two drives, so I used the Intel to connect up my four 1.5TB Western Digital Green drives.

As all my content (photos/docs/videos/music/virtual machines/etc) is on this redundant RAID set, I made sure to backup the ext4 filesystem that sits on top it with fsarchiver.  Secondly, I bought a 3TB drive as a utility drive to try out my fsarchive restores.  This is a good system, as it confirms my backup is valid:
1) unmount content filesystem (the filesystem that's on top of RAID)
2) backup content using fsarchiver to a system drive with enough space to hold the 1.4TB of content
3) as my livelihood depends on my content, test the fsarchiver restore process by restoring the archive to a third drive, a 3TB Seagate partitioned with GPT and formatted using ext4
4) when the restore is validated as good, copy the files from the restore over to my new RAID 1+0 set. 

I love the Corsair 400R case.  With the nice cable tunnels, I was able to keep the mainboard area pretty free of cables, though it doesn't look like it from the below pic.  You can see the pipes to the Corsair H100i in the center of the photo.


I ran most of the cables through the tunnels.  You can see how many cables were hidden using these tunnels:


I'm not a great cabler and I just wanted most of the cables out of the way.  Given that there are five 3.5" drives, one 2.5" SSD and a DVD player in the box, I think I did alright.

The real test was firing the box up for the first time.  I was rather shocked when it did come up, mainly for the worry that the memory wouldn't be compatible.  But it was.  Also, I had invested a great deal of time before the build in reading the 176-page manual and watching a bunch of build videos listed at the bottom of this post.  So the base build with a single SSD hard drive powered up successfully.  Hooray!

The next hurdle was installing a basic operating system, Fedora 18 64-bit on my single SSD in the machine.  Again, surprisingly, this worked without a hitch.  I had spent a good deal of time reading the FedoraProject's list of UEFI bugs and I was suspect of problems, but was very happy that I didn't encounter any.

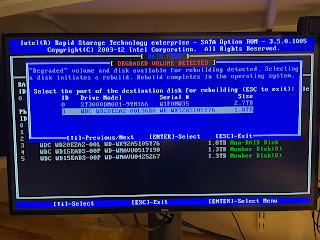
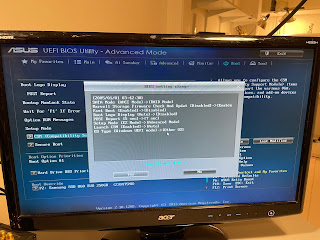
The final hurdle was migrating my four drives from my old workstation to run a RAID 1+0 configuration on the new box using the ASUS's Intel RAID chipset.  Once I moved the drives over, I  configured the BIOS in the Asus P9X79 to run RAID.  I then created the RAID set and rebooted the box.  I then saw three main screens on bootup:
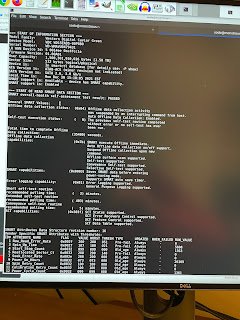
1) The Marvell RAID BIOS bootup screen:


2) The Intel RAID BIOS bootup screen:


3) The American Megatrends BIOS screen:


The American Megatrends BIOS and ASUS's UEFI BIOS screens are completely configurable and nicely laid out.  I won't be using many of the options, but it is just a pleasure to have a system that is so well stocked, but boots up quickly.  I'd say it takes about 30 seconds to get from cold start to my initial Fedora 18 grub2 prompt.

I haven't overclocked the mobo yet, but according to what I've been reading and the fact that I have good chip cooling via the H100i, I should be able to push the i7 from 3.2 to at least 4.6Ghz.

Wattage Used for Typical Tasks
Here is a chart of the tasks running in Fedora 18 x86-64 and the wattage used


Gnome System Monitor graphic
On the top row, the CPU History chart, you can see that my H264 video encode took about 40% of the CPU.  You can see all twelve CPUs being used.  On the bottom row, the Network History, you can see my upload to Vimeo.  The upload of my 530MB file took about 150s at a peak upload rate of 40Mbps.  That 40Mbps upload is courtesy of FIOS.


Next up: installing Windows 7 Professional so that I can do some baseline performance measurements.

ciao!
TAG

UPDATE 2013/11/23
I've been so busy at work for the last six months that I haven't had time to use the new box.  Turns out that I made a mistake in copying over my files to my new drive..I hadn't preserved the time/date stamp of all my files, normally accomplished with a "cp -Rp .."!  This means that I then can no longer tell when I edited any of my scripts, took a picture, etc, etc.  Bollucks!  So I had to grab the timestamps from my original drive and apply them via "touch".  The procedure looked something like this:

sudo find  -printf "%t %h/%f\n" > ~/temp.txt
awk '{print "touch -d \""$1,$2,$3,$4,$5"\"",$6}' temp.txt > fixDate.sh

temp.txt looked like this:
Thu Nov 22 12:37:26.0000000000 2012 ./sodo
Sat Jan 22 10:29:32.0000000000 2011 ./sodo/.netbeans
Sat Jan 22 10:29:32.0000000000 2011 ./sodo/.netbeans/.superId
Sat Jan 22 11:58:29.0000000000 2011 ./sodo/.netbeans/6.7

fixDate.sh looked like this:
#!/bin/bash -xv
/usr/bin/touch -d "Thu Nov 22 12:37:26.0000000000 2012" ./sodo
/usr/bin/touch -d "Sat Jan 22 10:29:32.0000000000 2011" ./sodo/.netbeans
/usr/bin/touch -d "Sat Jan 22 10:29:32.0000000000 2011" ./sodo/.netbeans/.superId
/usr/bin/touch -d "Sat Jan 22 11:58:29.0000000000 2011" ./sodo/.netbeans/6.

Then I plopped a #!/bin/bash at the top of the shell script, chmod a+x fixDate.sh, and off I went.  But the script worked, thankfully!  Unfortunately, I wasted about two hours dealing with this today.  Super drag!

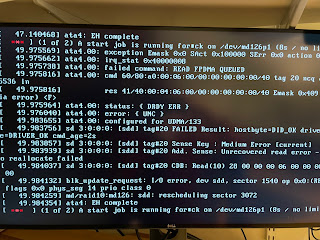
A second problem I see is when I use "mv" to move files to my new RAID set, the mv command gives me:
mv: setting attribute ‘security.selinux’ for ‘security.selinux’: Operation not permitted

Haven't figured out why tho.  Argh.
*** end update ***


References
ASUS P9X79 Home Page: https://www.asus.com/Motherboards/P9X79_DELUXE/
Manuals/Qualified Vendor Lists/Firmware Updates: http://usa.asus.com/Motherboards/Intel_Socket_2011/P9X79_DELUXE/#download

JJ of ASUS Republic of Gamers (asusrog) was immeasurably helpful in the builds.  In fact, I probably wouldn't have bought the board if I hadn't seen these videos.  Here are the core videos that helped me:
X79 Overview, Part I: http://www.youtube.com/watch?v=qGgQG3ANtaA
X79 Overview, Part II: http://www.youtube.com/watch?v=iE-YJafM65k
P9X79 Deluxe Hands-On Review: http://www.youtube.com/watch?v=xBPgv8aiL0Y
Build, Part I: http://www.youtube.com/watch?v=j9aY1HGYIyM
Build, Part II: http://www.youtube.com/watch?v=W8jogtOzw6Y

Overclocking on Sandy Bridge
Auto Overclocking: http://www.youtube.com/watch?v=Ct6tQaEsWYY
Part I: http://www.youtube.com/watch?v=Kx2z07sFM2I
Part II: http://www.youtube.com/watch?v=seVPIR06ZY4
Advanced Overclocking: http://www.youtube.com/watch?v=CZfOEs5n0jo

Non-JJ vid on overclocking: http://www.youtube.com/watch?v=8qz8olA8bRM

RAM Cache/SSD Cache
How to Setup a RAM Cache on a P7X79: http://www.youtube.com/watch?v=qGrqMllHVVY
RamCache/Ramdisk: http://www.youtube.com/watch?v=5cqfhZvyE80
SSD Caching: http://www.youtube.com/watch?v=uhCGo0LWaTY
SSD Caching (short version): http://www.youtube.com/watch?v=hvfiRA6hDhE


Cable Management
http://www.youtube.com/watch?v=5xKIiAu4rio

Feel free to drop me a line or ask me a question.